If you think fiberglass repair is just about slapping on a patch and calling it a day, you're in for a rough time. I've seen it countless times: a repair that looks okay for a month, only to crack, peel, or turn yellow. The real secret? 90% of a successful, lasting repair happens before you even open a can of resin.
Getting the prep work right is what separates a professional-grade fix from a temporary eyesore.
Your Pre-Repair Game Plan
Before you even think about grinding or mixing, you need a solid plan. This is where you assess the real damage, set up your workspace for success, and gather every single tool and material you'll need. Cutting corners here is the fastest way to a failed repair that looks amateurish and won't hold up.
A proper repair restores not just the look of your boat, but its structural integrity. With the global fiberglass boats market valued at USD 1.6 billion in 2023 and growing, more people are on the water than ever, making these skills essential. You can explore more about these market trends to see just how big the boating world is getting. A good repair protects your investment.
To do this right, you'll need the right gear. Having everything on hand before you start prevents frantic searching once the resin starts to cure.
Essential Tools and Materials for Fiberglass Repair
Here's a quick-reference table of the core items you should have ready for most common fiberglass jobs.
| Category | Essential Items | Purpose |
|---|---|---|
| Safety Gear | NIOSH-approved respirator, safety glasses, nitrile gloves, long-sleeve shirt | Protects you from toxic fumes and itchy fiberglass dust. |
| Prep Tools | Angle grinder with 36-grit disc, Dremel tool, tack cloths, acetone | For grinding out damage, feathering edges, and cleaning the surface. |
| Patching Materials | Marine-grade resin (polyester or epoxy), fiberglass cloth/mat, fillers | The core components for rebuilding the damaged laminate. |
| Application Tools | Mixing cups, stir sticks, plastic spreaders, chip brushes | For accurately mixing and applying resin and fillers. |
| Finishing Supplies | Sandpaper (80- to 600-grit), gelcoat, polishing compound, wax | For sanding the repair smooth and matching the original finish. |
Having these items organized and within reach is a non-negotiable part of a professional workflow.
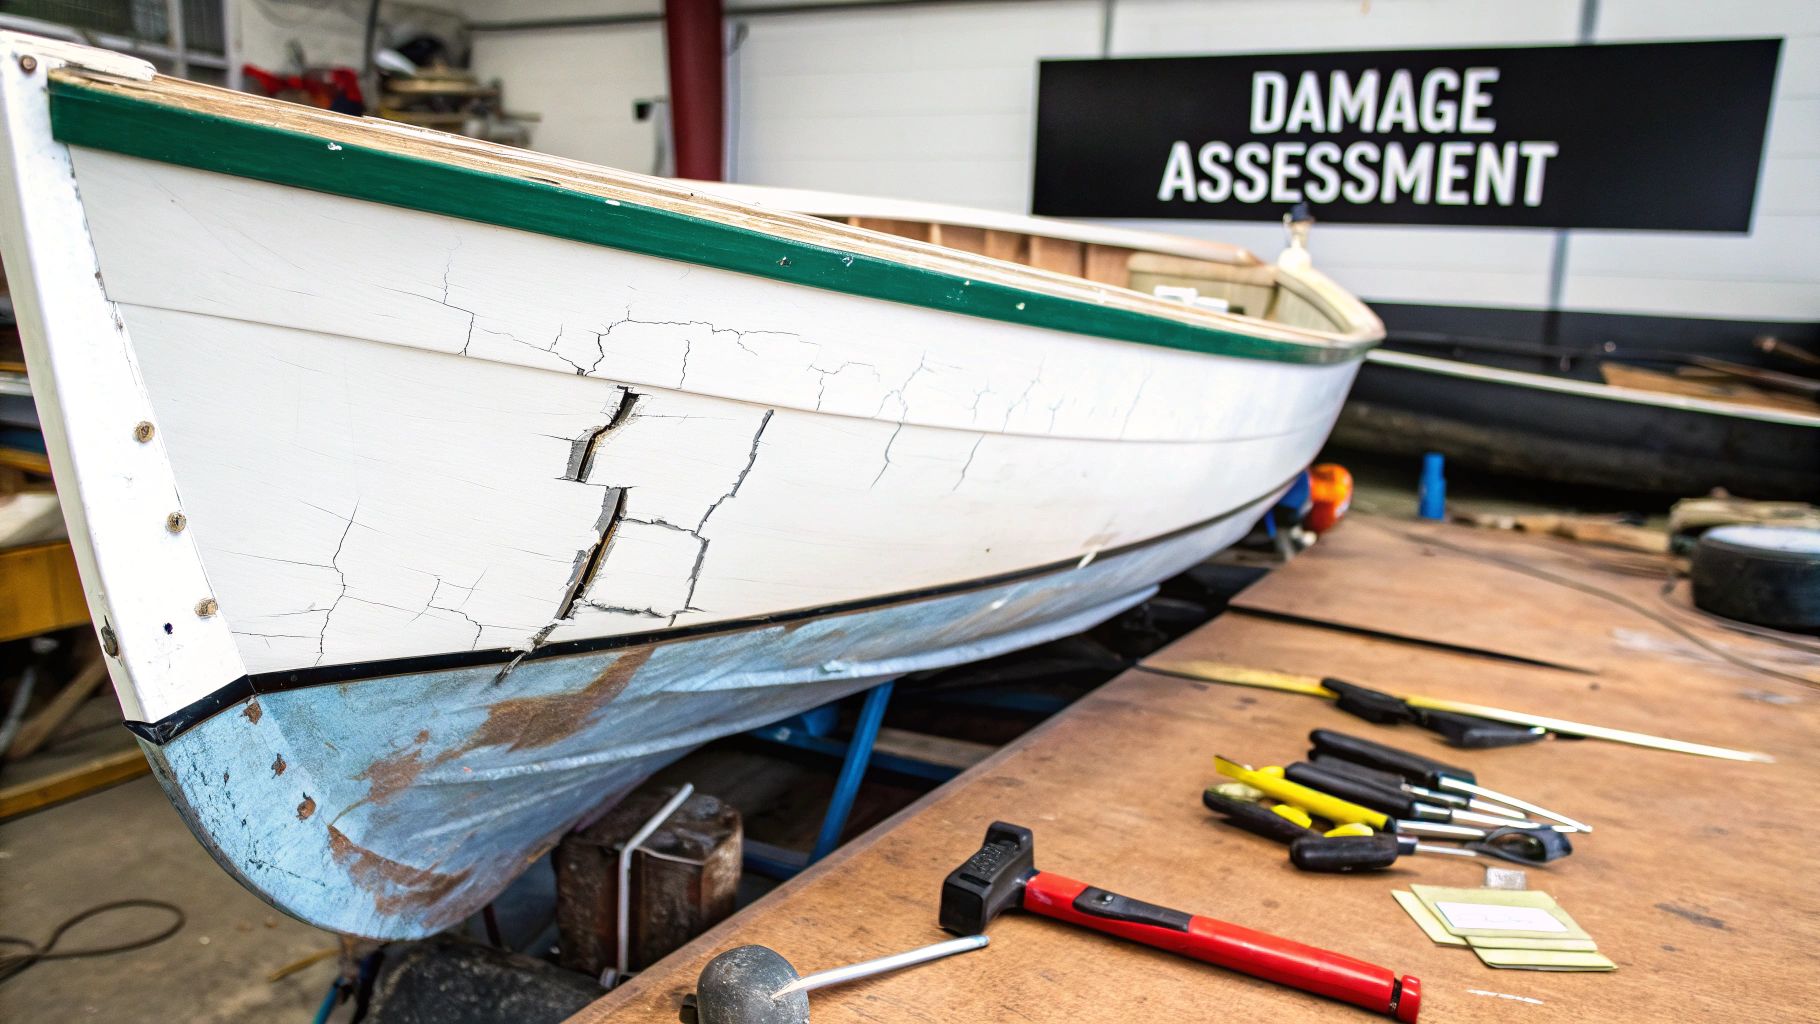
Accurately Assessing the Damage
First things first: you have to know exactly what you're fixing. A quick glance won't cut it. The type and depth of the damage dictate your entire strategy, from the materials you choose to the techniques you'll use.
- Cosmetic Cracks: These are those annoying "spider cracks" you see in the gelcoat. They look bad, but they're usually just on the surface and don't go into the structural fiberglass below.
- Deep Gouges: If you can see whitish, raw-looking fibers, you've got a gouge. This means the damage has gone through the gelcoat and into the fiberglass laminate itself. This requires more than just a simple filler.
- Punctures and Holes: This is the most serious type of damage. A hole that goes clean through the hull is a major structural repair. You'll need to build up new layers of fiberglass from the inside out to restore the boat's strength.
Pro Tip: Grab a plastic mallet or the handle of a screwdriver and tap gently around the damaged spot. A solid, sharp rap means the laminate is sound. If you hear a dull thud, you've likely found hidden delamination or water intrusion under the surface that you'll need to address.
Setting Up a Safe and Efficient Workspace
The environment you work in has a huge impact on the final quality of your repair. Fiberglass dust and resin fumes are no joke, so setting up a clean, safe area is critical.
Ventilation is Non-Negotiable
Polyester resin fumes, in particular, are nasty stuff—toxic and flammable. Always work in a space with plenty of airflow. If you’re in a garage, open every door and window and get some fans moving to create a cross-breeze. A respirator with organic vapor cartridges isn't optional; it's essential.
Protect Your Boat and Yourself
That fine, white dust from grinding fiberglass gets absolutely everywhere and itches like crazy. Use high-quality painter's tape and plastic sheeting to mask off a wide area around the repair. This keeps the dust contained and prevents you from accidentally scratching the good gelcoat while you're sanding. This kind of protection is just as important as the routine maintenance you do each year—for more on that, check out our guide on how to winterize your boat.
Get all your tools laid out and ready to go before you mix that first batch of resin. Once you add the hardener, the clock is ticking. Being prepared is the key to a calm, controlled, and successful repair.
Getting the Damaged Area Ready for a Lasting Repair
The real secret to a fiberglass repair that lasts a lifetime isn't in the fancy resins or the type of cloth you use. It's earned in the prep work—the meticulous, often tedious, process of getting the surface just right. Honestly, this is the single biggest reason DIY repairs fail. Cutting corners here leads to patches that peel off, crack under stress, or just look awful.
Think of it like laying a foundation for a house. You can't just pour concrete on soft, uneven dirt and expect it to hold. We need to create a solid, clean, and perfectly contoured surface for the new fiberglass to grab onto. This is about more than just a quick scuff with sandpaper; it's about using the same grinding techniques the pros rely on to guarantee an unbreakable bond.
How to Handle Cracks with a V-Groove
If you're dealing with fine hairline or spider cracks in the gelcoat, just smearing filler over the top is asking for trouble. I can almost guarantee that crack will show up again in a season or two. To fix it for good, you have to give the repair material something substantial to bite into. The best way to do that is with a V-groove.
Grab a Dremel tool and pop in a small, V-shaped grinding bit. Your job is to carefully trace the entire length of the crack, grinding it out into a shallow "V" shape. This does two things: it removes the fractured, weakened gelcoat and creates a channel with angled sides. Those angles dramatically increase the surface area, giving your new gelcoat or filler a much stronger grip.
Don't get carried away and start digging a trench. You only need to grind through the gelcoat layer itself. The idea is to completely eliminate the crack, not start a major excavation project. This simple but critical step turns a weak point into a solid, fully integrated repair.
Mastering the Tapered Edge for Structural Damage
When you're facing bigger problems—deep gouges, punctures, or holes that go right through the fiberglass laminate—you need to restore the boat's structural integrity. This calls for a different approach: creating a beveled, or tapered, edge all the way around the damaged spot. This technique is designed to spread the load and stress of the repair across a much wider area, which is key to preventing new cracks from forming around your patch down the line.
The rule of thumb here is the 12:1 taper ratio. What that means is for every inch of laminate thickness, you need to grind the bevel back 12 inches. So, for a pretty standard 1/4-inch thick hull, you'd be creating a 3-inch taper around the entire perimeter of the hole.
I know, that sounds like a lot, but trust me, it's absolutely essential for a strong repair. A steep, cliff-like edge concentrates all the stress right at the seam, making it the most likely point of failure. A long, gradual slope, on the other hand, lets you lay in progressively larger pieces of fiberglass cloth. This creates a powerful, overlapping bond that blends seamlessly into the original hull.
The right tool for this job is an angle grinder armed with a coarse 36-grit disc. Start from the middle of the damaged area and work your way out, gently feathering the edges to get that smooth, consistent slope.
Choosing the Right Sandpaper Grit
Sanding isn't just one step; it's a progression. The grit you pick at each stage makes a huge difference in the final quality of your prep. If you jump in with a grit that's too coarse for the job, you'll create deep scratches that become a real pain to remove later.
Here's the progression I stick to for the best results:
-
Initial Grinding (36-grit): This is your workhorse for the heavy lifting. Use it with your angle grinder to create that 12:1 bevel and chew through any damaged, delaminated fiberglass. Be aggressive, but keep it contained within your repair zone.
-
Feathering and Shaping (80-grit): Once the rough shape is there, switch over to 80-grit sandpaper. I like to use a dual-action (DA) sander for this, but a sanding block works too. This step smooths out the deep scratches left by the 36-grit disc and lets you perfectly feather the edges for a seamless transition.
-
Final Prep and Cleaning: Right before you even think about mixing resin, you need to get the area surgically clean. First, wipe everything down with a tack cloth to pick up all the fine dust. Then, do a final wipe-down with a clean, lint-free rag and some acetone. The acetone is crucial—it evaporates quickly and removes any stubborn oils, wax, or contaminants that could ruin the bond.
Following these steps methodically ensures your new patch will lock into the hull both chemically and mechanically. You'll end up with a repair that’s not just invisible, but in many cases, even stronger than the original fiberglass.
Applying Fiberglass And Resin With Confidence
Once your repair area is fully cleaned and abraded, you move on to rebuilding the structure. Here’s where that gouge or crack turns into a solid section of hull again. It’s all about a precise lamination process—no shortcuts.
Mastering The Resin Mix
Deciding on the right resin can feel like a crossroads. Polyester resin is budget-friendly and widely available, while epoxy resin offers superior adhesion and better water resistance—ideal for below-the-waterline fixes.
Below is a quick comparison to help you choose:
Epoxy Resin vs Polyester Resin
| Feature | Epoxy Resin | Polyester Resin |
|---|---|---|
| Adhesion | Excellent—bonds strongly to old laminate and metals | Good, but may lift over time in damp conditions |
| Water Resistance | High—minimal shrinkage and superior barrier properties | Moderate—prone to minor osmosis |
| Cure Time | Typically 4–6 hours at 77°F | 20–30 minutes, accelerates in warmth |
| Cost | Higher upfront investment | More economical for large-area repairs |
Use this chart to match performance needs with your budget and project scope.
Keep two rules in mind for flawless mixing:
- Follow the Label: Stick exactly to the manufacturer’s resin-to-hardener ratio. Deviating leads to brittleness or an uncured tack.
- Mind the Temperature: Resin cures faster on a hot day and crawls on cold surfaces. On chilly mornings, warm your resin jars in a bucket of hot water for a consistent cure.
Adding extra catalyst in cold weather may seem tempting, but it weakens the chemical structure. Wait for a warmer window or set up a controlled heat source.
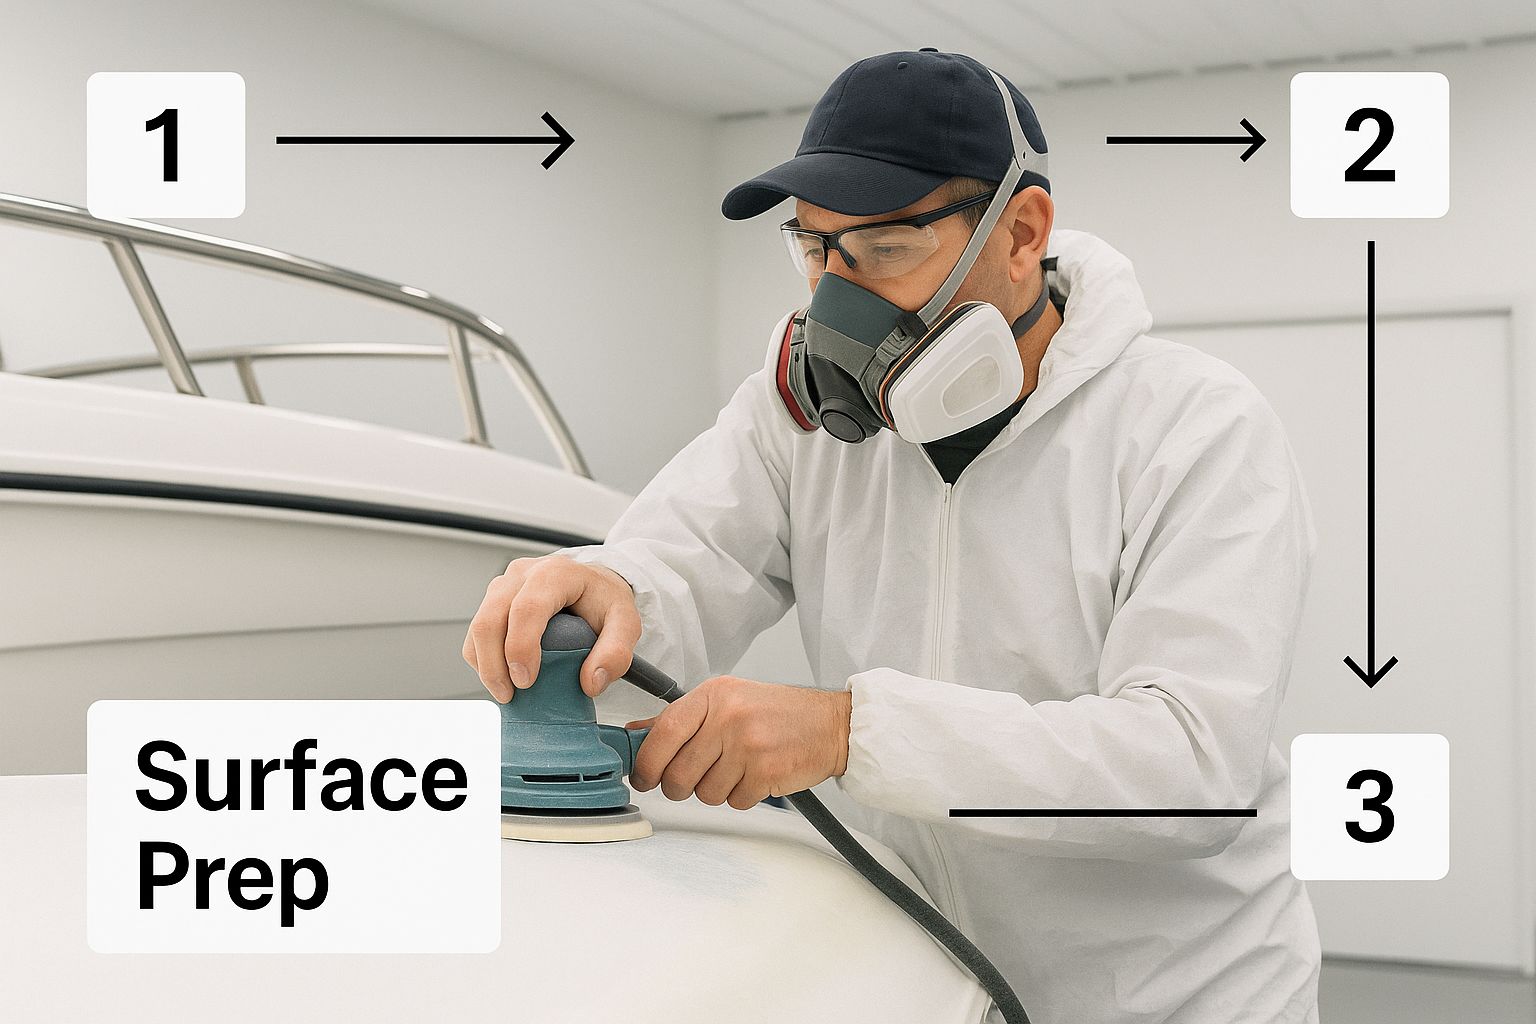
This graphic underscores that meticulous surface preparation is non-negotiable before touching resin.
Cutting And Layering Fiberglass
Before you open that resin, organize your glass. I usually pair chopped strand mat with woven cloth. Mat fills gaps and nests into curves, while cloth adds tensile strength.
Try this layering trick:
- Cut a small patch to cover just the hole.
- Prepare several larger patches in graduated sizes.
- Taper each layer so stress dissipates into the surrounding laminate.
Lay the patches out in order on cardboard. When time is tight, it’s a relief not to scramble for the next size.
Achieving A Perfect Wet-Out
“Wetting out” means fully saturating the glass without leaving white dry spots. Brush a thin coat of mixed resin onto your bevelled repair and press in the first cloth.
Then switch to a light dabbing motion to push resin through the fibers. You’ll see the cloth transition from opaque to translucent—your signal to move on.
Continue layer by layer, checking each one for uniform translucence before adding the next.
This industry is constantly evolving, driven by improved formulations and techniques. The global fiberglass market was valued at USD 12.79 billion in 2024, and advancements arrive every season. You can read the full research about the fiberglass market to follow these trends.
Eliminating Air Bubbles For Maximum Strength
Air pockets spell weak spots. Every bubble is a potential crack starter, so you want them gone:
- Use a plastic squeegee to push out trapped air, moving from center to edge.
- Invest in a fiberglass roller (finned aluminum) to press layers together and force bubbles out.
- Work deliberately. Pause after each layer to scan for silvery specks or white islands.
Once you’ve consolidated every layer and eliminated bubbles, your new laminate is as strong as the original hull. Let it cure fully before tackling the final sanding and finish coat.
The Art of Fairing for an Invisible Repair
A strong patch is one thing, but making a repair completely disappear is the mark of real craftsmanship. After your new fiberglass has fully cured, you’ll have a solid patch, but it's going to look rough. This is where fairing comes in—the careful, methodical process of shaping and smoothing the repair until it blends seamlessly with the hull's original lines.
Honestly, skipping this part is what separates a professional job from an obvious, lumpy eyesore. The goal is simple: fill the low spots and sand down the high spots until the surface is perfect. This isn't just about looks; you're creating a flawless canvas for the final gelcoat. Any unevenness will stick out like a sore thumb once that glossy topcoat goes on.
Choosing and Mixing Your Fairing Compound
First things first, you need the right material to fill the shallow hollows over your fiberglass patch. You're looking for a dedicated fairing compound, which is basically a specialized body filler made for the marine world. These are usually two-part epoxy or polyester putties that are thick, spread easily, and won't sag on you when you're working on a vertical surface.
What sets marine fairing compounds apart is that they're designed to be easy to sand while staying tough and water-resistant. I’ve found that most pros lean toward epoxy-based fillers. Their adhesion is fantastic, and they shrink very little as they cure—a huge plus for preventing cosmetic problems down the road.
When you're ready to mix, grab a clean, non-porous surface like a plastic mixing board or even a scrap piece of plexiglass.
- Don't mix too much at once. Only mix what you can realistically apply within the product's working time, which is often a tight 15-20 minutes.
- Follow the directions to the letter. The ratio of resin to hardener specified by the manufacturer isn't a suggestion. Get it wrong, and it may never cure properly.
- Mix it like you mean it. Keep blending the two parts until the color is completely uniform, with no streaks of unmixed material.
A classic rookie mistake is globbing on the fairing compound, thinking more is better. All that does is create a ton more sanding work for you. Apply thin, smooth coats, building up the area bit by bit instead of piling on one thick layer.
Getting the Feel for Application
With your compound mixed, it's time to get it on the hull. Using a flexible plastic spreader held at a low angle is the way to go. You want to press firmly and drag the spreader across the patch, forcing the filler into the fiberglass weave and any small dips.
Think of it like frosting a cake—you're aiming for a smooth, even layer that slightly overfills the repair, leaving it just a hair proud of the surrounding gelcoat. That tiny bit of excess is crucial; it gives you material to sand away as you sculpt the final shape. You'll probably end up applying two or three thin layers, with a light sanding between each one once it's cured, to get the profile just right.
Block Sanding: The Secret to a True Hull Shape
This is it—the most critical part of the whole fairing process. We're not just grabbing a piece of sandpaper and going to town. To get a truly flat, fair surface that follows the boat's curves perfectly, you must use a sanding block. For bigger jobs, a longboard is your best friend.
If you just use your hand, your fingers will naturally follow every little imperfection, creating ripples and low spots you can't even see. A rigid block or a flexible longboard solves this by bridging the low spots and only sanding the high points, forcing the entire area to become level.
Here’s a sanding progression that has never failed me:
- Start with 80-grit sandpaper on your longboard or block. This is aggressive enough to knock down the excess fairing compound quickly without taking forever.
- Use long, diagonal strokes. Sand first in one direction, then in the opposite direction to create a cross-hatch pattern. This technique is key to preventing yourself from accidentally digging a groove or flat spot into the hull.
- Every so often, stop and run your hand over the surface. Close your eyes if you have to. Your sense of touch is often more reliable than your eyes for spotting tiny high or low spots.
These same fairing principles are essential when prepping a boat's bottom for new paint. A perfectly faired surface is the foundation for a great finish. You can find more tips on that in our guide on how to bottom paint your boat.
Once the surface feels completely smooth and fair with the 80-grit, you're ready to move on. Switch to a finer 120-grit paper, and then finish with 220-grit to erase the deeper scratches left by the coarser grits. Each step refines the surface, getting it ready for the primer and gelcoat that will bring your repair to a beautiful, invisible conclusion.
Nailing the Final Gelcoat Finish
This is where the rubber meets the road. After all the grinding, patching, and fairing, applying the gelcoat is what makes your hard work either stand out or disappear completely. This final stage is all about finesse, not force. It’s the step that restores your boat's protective skin and brings back that deep, factory shine.
The single biggest mistake I see people make is botching the color match. A perfect, bright white repair on a hull that’s yellowed slightly over years in the sun looks just as bad as the original gouge. Taking the extra time to get the color right is what separates a decent job from a professional one.
Matching Gelcoat to a Faded Hull
Getting a perfect color match is a true art, especially on a boat that’s seen a few seasons. Your hull has been baked by UV rays, and its original color has almost certainly shifted. Grabbing a pre-mixed gelcoat based on your boat’s model year is a recipe for a mismatched patch.
The real trick is to tint the gelcoat yourself. You'll want to start with a basic white or off-white gelcoat and buy a few small pigment tubes. I always keep black, yellow, and brown on hand, as they’re the key to "aging" a new white to match an older hull.
Always work in good, natural light—never under fluorescent shop lights. Mix a tiny test batch, adding just a pinprick of pigment at a time with a toothpick or stir stick. Seriously, a little goes a very long way. Dab a spot right next to your repair on a clean, buffed section of the original hull. Once it cures, you can see the true color. Keep adjusting and making test spots until it’s a dead-on match.
Don't trust the color you see in the mixing cup. Gelcoat almost always darkens as it cures. Your cured test patch on the hull is the only color that matters.
Choosing the Right Kind of Gelcoat
Not all gelcoat is the same, and using the wrong type can ruin your repair. The choice comes down to one simple thing: does it have wax in it or not?
-
Laminating Gelcoat: This stuff has no wax. It’s meant for building up layers. It stays a little tacky even after it cures, which is exactly what you want so the next coat can form a solid chemical bond.
-
Finishing Gelcoat: This is your topcoat. It's got a wax additive blended in. As the gelcoat hardens, that wax floats to the top, creating a barrier against the air. This allows it to cure completely hard and tack-free, which is critical for your final surface.
A lot of pros, myself included, will often use unwaxed gelcoat for the build-up coats and then just add a wax additive to the final batch. It saves you from having to buy two different cans and gives you a rock-solid, sandable finish.
How to Apply It for a Smooth Finish
For small dings and scratches, you can absolutely get a great result with a brush and roller. Lay on the gelcoat with a good solvent-resistant brush, then immediately go over it with a small foam roller. This knocks down the brush strokes and gives you a consistent "orange peel" texture that you’ll sand smooth later.
When you’re tackling larger areas, spraying is the only way to go. A simple Preval sprayer or an HVLP spray gun will give you a much more uniform coat. Just be sure to thin the gelcoat properly, usually by about 10-15% with a reducer like styrene, or it won't flow through the gun correctly. Check the manufacturer's sheet for their specific recommendation.
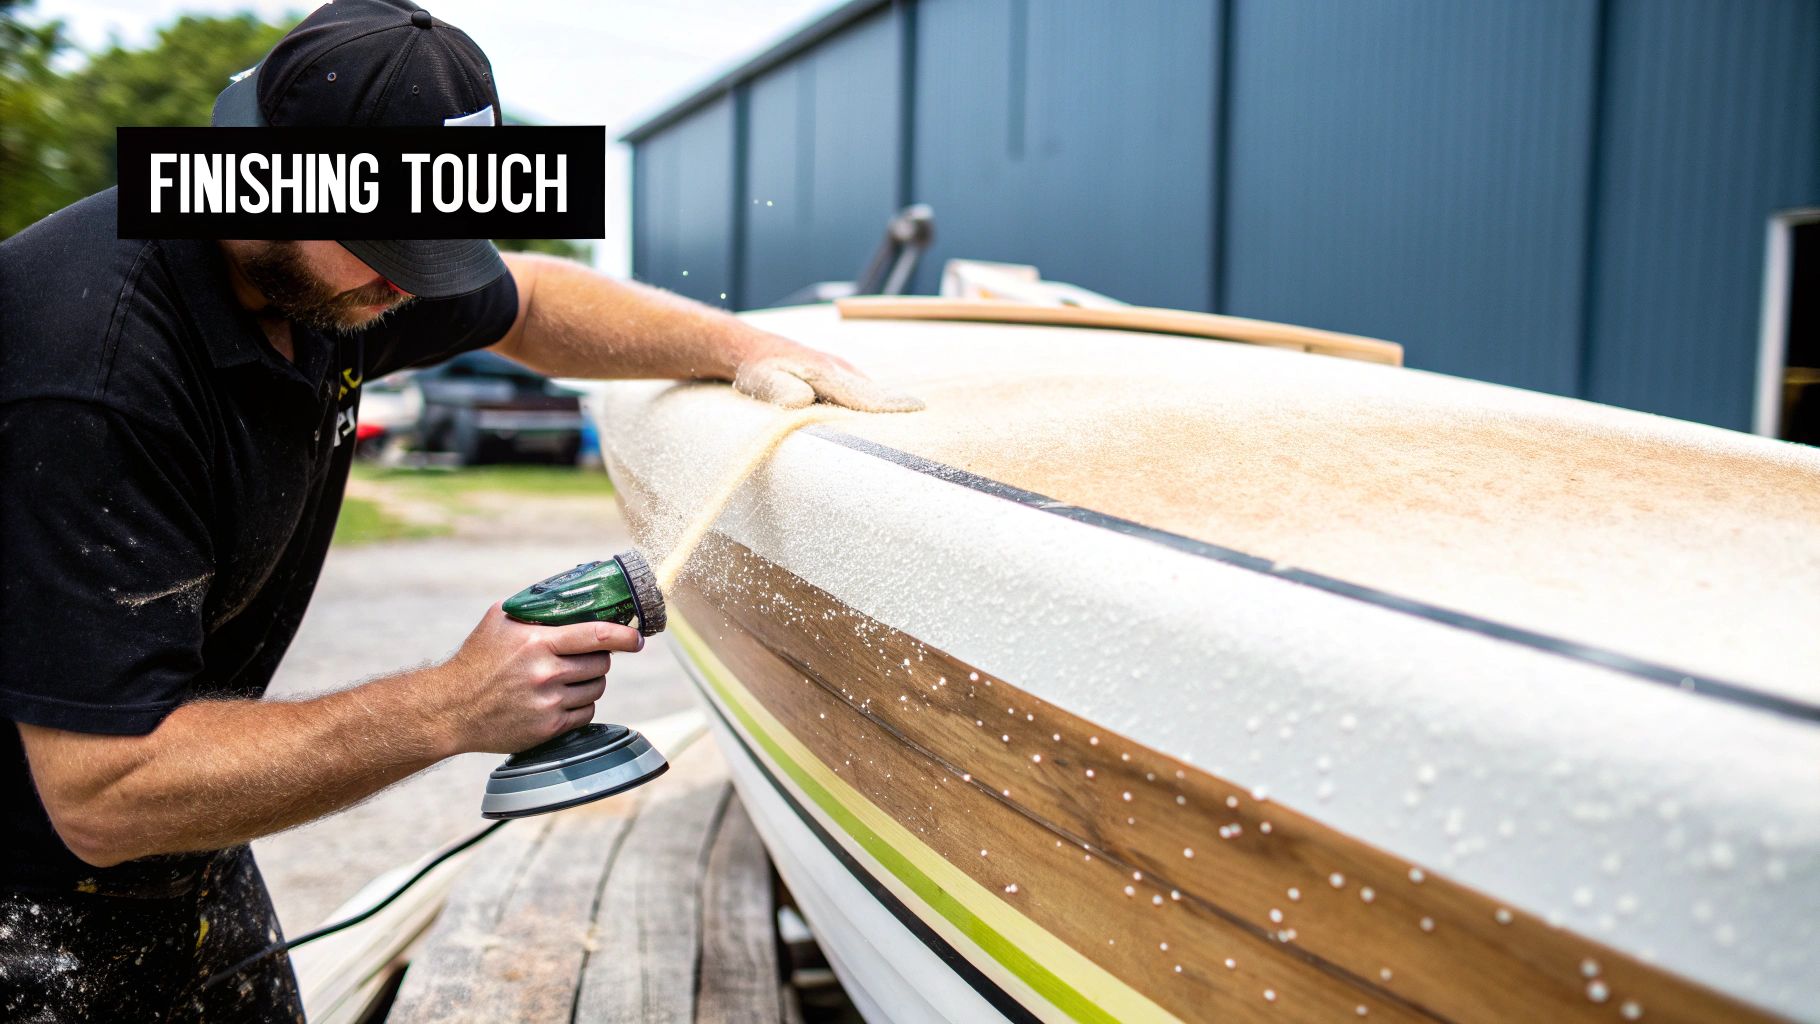
The Final Polish
Let your final gelcoat layer cure for at least 24 hours. Don't rush it. The surface will likely have that slightly bumpy orange-peel texture. Now, it's time to make it shine.
You'll start by wet sanding. Using waterproof sandpaper on a sanding block, begin with 400-grit to level the surface. Keep the area wet and work your way up through the grits: 600-grit, then 800-grit, and finish with 1200-grit.
The surface will be incredibly smooth but will look hazy and dull. To bring back the gloss, you’ll need a variable-speed polisher with a wool compounding pad. Apply a quality polishing compound and work it over the area until the shine perfectly matches the surrounding hull. One last step: protect all your hard work with a good coat of marine wax.
Answering Your Top Fiberglass Repair Questions
Even the clearest set of instructions can't cover every situation you'll run into. When you're in the middle of a fiberglass repair, real-world questions always pop up. Getting these right can be the difference between a fix you're proud of and one you have to do all over again. Let's dig into some of the most common things boat owners ask.
Can I Really Repair Fiberglass Below the Waterline Myself?
You absolutely can, but you have to treat this repair with the seriousness it deserves. Any patch below the waterline is a critical one, and for that reason, epoxy resin is your only real choice. Its ability to bond tenaciously and block water is far superior to polyester resin, which simply won't hold up over time in a constantly submerged environment.
The biggest enemy here is moisture. You need the repair area to be completely, utterly dry. Sometimes I'll even use a heat gun on a low setting, moving it constantly, to gently coax any trapped moisture out of the fiberglass laminate. When you lay up your new fiberglass, it has to be perfect—no air bubbles, no voids. Any tiny gap is a potential entry point for water, which can lead to much bigger problems down the road.
My Two Cents: Don't ever rush a job below the waterline. The structural integrity of your hull is on the line. If you feel even slightly out of your depth, calling in a professional is the smartest move you can make.
How Long Do I Have to Wait for the Repair to Cure?
This is probably the most common question, and the honest answer is: it depends. There's no single magic number. Cure time is a moving target that changes based on the type of resin you're using, the temperature in your workspace, and how much hardener you mixed in.
- Polyester Resin: This stuff kicks off fast. On a warm day, say around 75°F, you might be able to start sanding in just a couple of hours. But don't be fooled—that's just a surface cure. For the repair to reach its full, rock-solid strength, you're looking at several days.
- Epoxy Resin: Epoxy is a different animal altogether. It cures slowly and deliberately. You'll need to give it a full 24 hours at a minimum before you even think about touching it with sandpaper. For it to achieve its maximum hardness and chemical resistance, you should really give it up to a week.
The golden rule is to read the can. The manufacturer's instructions are your definitive guide and are based on a ton of testing. Trust them.
What’s the Difference Between Fiberglass Cloth and Mat?
It really comes down to a trade-off between strength and bulk.
Think of fiberglass mat as a tangle of short, random strands of glass. It’s fantastic for building up thickness in a hurry and it easily drapes over complex shapes without much fuss. Its weakness? It doesn't have a lot of strength in any particular direction.
Fiberglass cloth, by contrast, is a woven fabric. Those interwoven strands give it incredible tensile strength, which is why it's the backbone of any serious structural repair. For a truly professional-grade fix, you'll often see a combination of the two: a layer of mat to build bulk and fill gaps, followed by layers of cloth to provide the real muscle. This gives you the best of both worlds—a solid, strong, and durable repair.
Here at Boating Articles, we're passionate about helping you get the most out of your time on the water, whether you're a new owner figuring things out or a seasoned pro. For more helpful content, from buying your first boat to advanced maintenance, check out our full library of guides at https://boating-articles.com.