Let's be honest—dedicating a whole weekend to waxing your boat can feel like a serious chore. But if you shift your mindset and see it as an investment instead of just another task, it completely changes the game. It's hands-down one of the best things you can do to protect your pride and joy from the harsh marine environment.
Think of a good marine wax as high-performance sunscreen for your boat's gelcoat. Without that crucial protective layer, the sun's ultraviolet rays go to work breaking down the finish. That's what leads to that chalky, faded look we all know as oxidation.
The Shield Against the Elements
A quality wax job goes far beyond just blocking the sun. It creates a tough barrier against all sorts of corrosive elements that are constantly trying to dull your shine. Saltwater, for instance, leaves behind abrasive salt crystals that can slowly etch and damage the surface.
A freshly waxed hull is hydrophobic, which is just a fancy way of saying it sheds water like a duck's back. This helps prevent ugly stains from pollutants, bird droppings, and other environmental gunk that's always present in the water.
There’s a neat little side benefit, too. That slick, protected surface can actually reduce a bit of drag in the water. While you probably won't be breaking any speed records, a smoother hull can contribute to small but noticeable improvements in performance and even fuel efficiency.
More Than Just a Niche Task
It's clear that boat owners are catching on. The global market for boat waxes has been growing steadily, fueled by the boom in recreational boating and a greater awareness of proper maintenance. This isn't just a trend; it's a collective understanding that protecting a boat from UV damage and saltwater is non-negotiable if you want to preserve its value. You can read more about this industry trend and its impact on how we care for our vessels.
The Bottom Line: Waxing your boat isn't just about making it look pretty for the season. It’s an act of preservation. You're actively defending your vessel against UV degradation, fighting off corrosion, and protecting its long-term value. That turns a weekend chore into a smart investment in your boat's future.
Picking Your Tools and Wax: The Foundation of a Great Shine
Walking into a marine supply store can feel a little dizzying. You're hit with a wall of polishes, compounds, and waxes, all promising to give your boat a mirror finish. But here's the thing: knowing how to wax a boat properly really begins with choosing the right gear before you even touch the hull. What you pick directly affects not just the final look, but how long your hard work actually lasts.
The heart of your setup is, of course, the wax itself. The market for these products is massive for a reason—boat owners are serious about maintenance. Just look at the boat polish market, a close cousin to waxing; it was valued at around USD 145 million in 2024 and is expected to climb. That number tells a story about the demand for products that deliver real, lasting protection. You can dig deeper into these marine care industry trends to see just how much is invested in keeping boats looking their best.
Now, let's get into the nitty-gritty of what you'll need.
Choosing Your Boat Wax: Carnauba vs. Synthetic Polymer
Your first big decision is whether to go with a traditional carnauba-based wax or a modern synthetic polymer sealant. There’s no single "best" answer here; they just do different things. Think of it like choosing between oil and latex paint for your house—both offer protection, but they provide different finishes, durability, and application experiences.
Here's a quick rundown to help you decide which team you're on.
Choosing Your Boat Wax: Carnauba vs. Synthetic Polymer
| Feature | Carnauba Wax | Synthetic Polymer Sealant |
|---|---|---|
| The Look | Unbeatable depth and a warm, "wet look." The gold standard for a rich, classic shine. | A crisp, high-gloss, reflective sparkle. Think more "hard candy shell." |
| Durability | Lower. Expect a few months of protection, especially in harsh sun and saltwater. | Excellent. Creates a tough, slick barrier that can last an entire season. |
| Application | Softer and often easier to apply by hand, but requires more frequent reapplication. | Bonds chemically to the surface; often requires a specific curing time. |
| Best For | Show boats, freshwater boats, or owners who enjoy the process and wax frequently. | Boaters seeking maximum, long-lasting UV and environmental protection with less work. |
Ultimately, the choice comes down to your priorities: are you chasing that ultimate show-car shine, or do you need rugged, season-long protection?
The Best of Both Worlds: A trick many seasoned boaters use is to apply a synthetic polymer sealant first. Let it fully cure to create a durable, protective base. Then, top it off with a coat of high-quality carnauba. You get the long-lasting protection of the sealant and the incredible depth and warmth of the carnauba. It’s an extra step, but the results are phenomenal.
By Hand or With a Buffer?
Next up: how are you going to get this stuff on the boat? Applying wax by hand is the old-school method, and it works just fine. All you need is a good applicator pad and some elbow grease. It’s a great choice for smaller boats or for folks who just enjoy the hands-on process.
But for most boats over 20 feet, an orbital buffer is an absolute game-changer. I’m not talking about a high-speed rotary buffer—those can burn right through your gelcoat if you don't know exactly what you're doing. A dual-action (DA) orbital buffer is what you want. It oscillates in a random pattern, which spreads the heat and makes it incredibly safe for beginners.
Trust me, a DA buffer will not only save you hours of work but also give you a far more even and professional-looking finish than you could ever achieve by hand.
Here’s a quick shopping list to get you started:
- A good-quality marine boat soap
- Plenty of clean microfiber towels (have separate piles for application and removal)
- Foam applicator pads
- A dual-action orbital buffer (highly recommended)
- Your chosen wax or sealant
The Critical Hull Preparation Process
Here’s a truth every seasoned boat owner knows in their bones: a stunning wax finish is 90% preparation. You simply can't slap a coat of wax over a dirty, chalky, or contaminated hull and expect anything but a mess. It's like trying to paint a dusty wall—the finish just won't stick, and you'll have wasted a perfectly good Saturday.
Before you even think about popping the top on that can of wax, your boat’s hull needs to be a perfectly clean and smooth canvas. This initial stage is, without a doubt, the most labor-intensive part of the job. But it's absolutely non-negotiable if you want a professional-grade shine that actually lasts.
The Essential Deep Clean
First things first, the boat needs a serious bath. And I don't mean a quick rinse. You've got to get rid of every last trace of salt spray, grime, bird droppings, and that lovely "waterline beard." Grab a high-quality marine soap that’s pH-neutral. Stay away from harsh detergents like dish soap; they're notorious for stripping off old wax and can be tough on your gelcoat over time.
Especially on a warm, sunny day, work in manageable sections so the soap doesn't dry on the hull before you can rinse it clean. A soft-bristle brush on an extension pole will save your back and let you scrub the whole hull without turning into a pretzel. For a complete masterclass on washing techniques, take a look at our guide on how to clean your boat.
This infographic really drives home the first, and most crucial, step of the prep work.
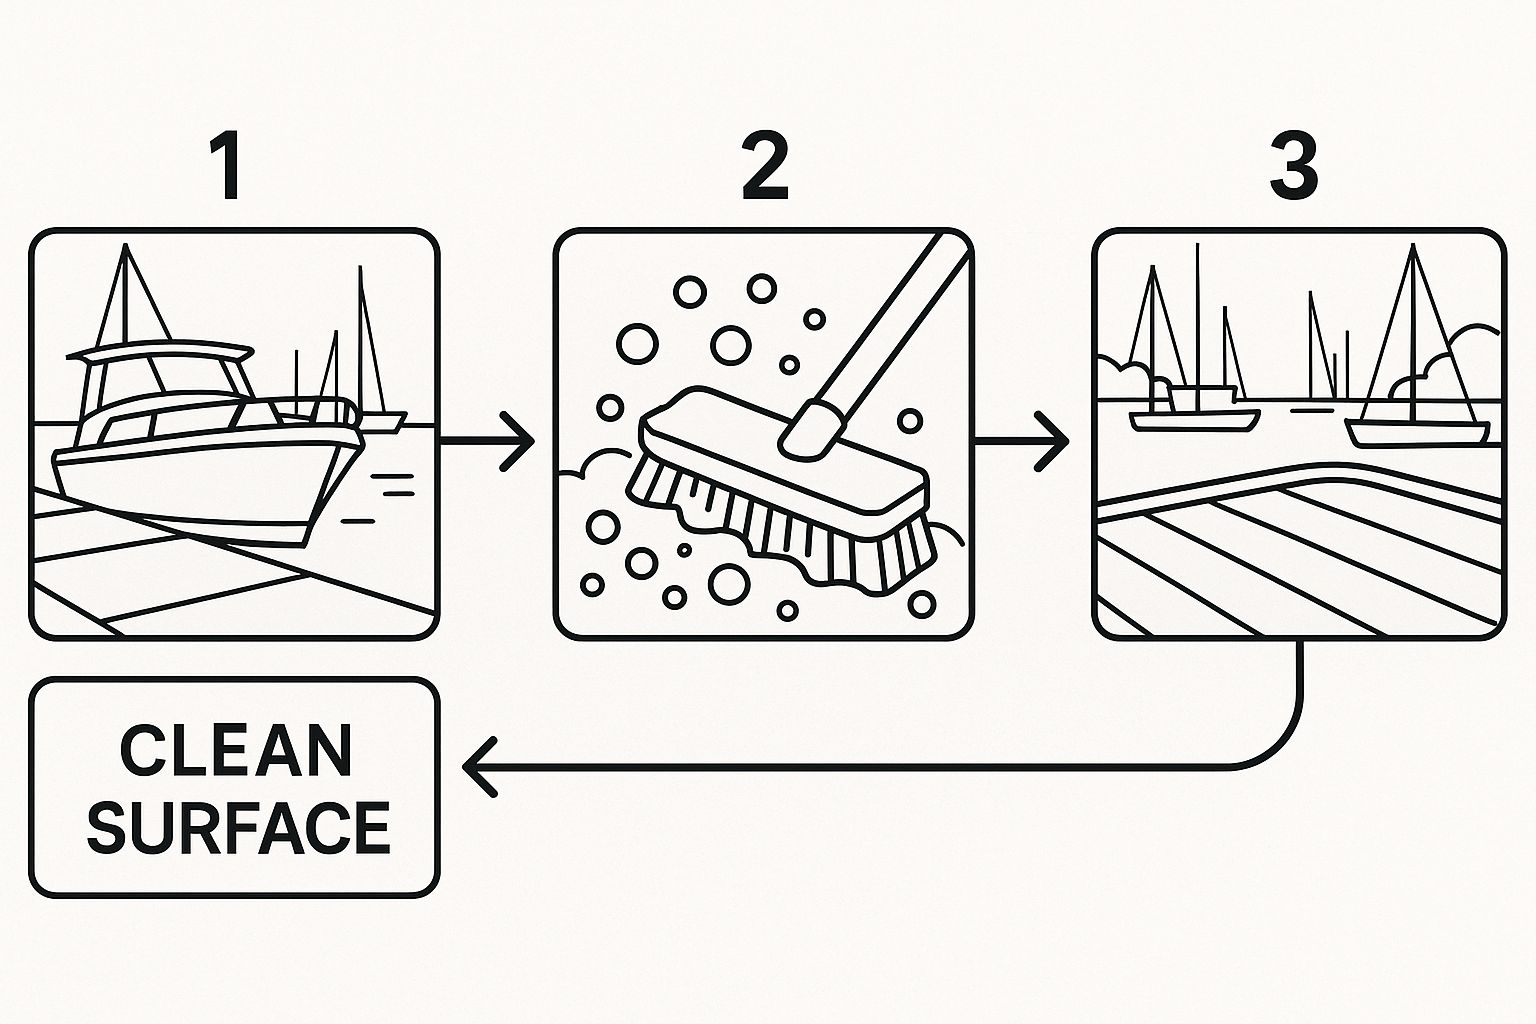
As you can see, starting with a spotless surface is the foundation for everything else you're about to do.
Getting a Feel for the Hull's Condition
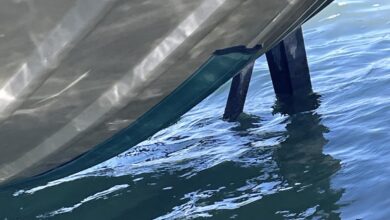
Once the boat is clean and completely dry, it's time for the touch test. Close your eyes and run your hand lightly across the gelcoat. Does it feel slick and smooth, like a piece of glass? Or do you feel a rough, almost chalky texture?
That chalkiness is oxidation, the calling card of UV damage breaking down the gelcoat. You might also feel tiny, gritty bumps under your fingertips. Those are bonded contaminants—industrial fallout, rail dust, mineral deposits—that a simple wash just can't lift. If you ignore these, you're just sealing them under the new wax, which will stop it from bonding properly and severely shorten its life.
Bringing Back the Luster with Polish
If your hull felt chalky, you'll need to break out a polish or a fine-cut rubbing compound to restore the surface. This is the magic step for bringing back the deep color and gloss to a faded boat.
- For light oxidation: A quality marine polish is usually all you need. It uses a gentle combination of chemical cleaners and fine abrasives to whisk away the dead, oxidized layer.
- For moderate to heavy oxidation: You might need to step up to a rubbing compound. The key is to always start with the least aggressive product that will get the job done. I can't stress this enough. Using a dual-action orbital buffer here is a game-changer for getting an even, swirl-free result.
A tip I learned the hard way: always work in small, two-by-two-foot sections. This keeps the product from drying out before you can properly work it in and buff it off. Your finish will be far more consistent across the entire hull.
Removing Stubborn Contaminants with a Clay Bar
What if the hull still feels gritty even after washing and polishing? Your secret weapon is a marine clay bar. This isn't just regular clay; it's a specially designed resin compound that gently pulls those stubborn, embedded contaminants right out of the gelcoat's pores.
Using one is simple. You'll need a lubricant spray—a dedicated clay lube or even a spray bottle with a soapy water mix works in a pinch. Mist a small area, flatten the clay into a patty, and just glide it back and forth over the surface. You'll feel it "grab" at first, then move smoothly as it pulls the grit free. Just remember to fold the clay often to expose a fresh, clean surface.
This final prep step creates an unbelievably smooth surface. It's the perfect foundation for wax to bond to and is what truly separates a good wax job from a great one. Once you're done, your hull is finally ready for its protective coat.
Applying and Buffing Wax Like a Professional
With a hull that’s clean, smooth, and fully prepped, you’re finally ready for the most satisfying part of the job. This is where all that prep work pays off, transforming the boat from simply clean to truly stunning.
Whether you're working by hand or with a machine, the guiding principle is the same: less is more. A common rookie mistake is slathering on the wax, thinking more product equals more protection. It doesn’t. It just makes the wax incredibly difficult to remove and often leaves a streaky, uneven mess. Your goal is a thin, consistent layer that can haze over properly before you buff it to a brilliant shine.
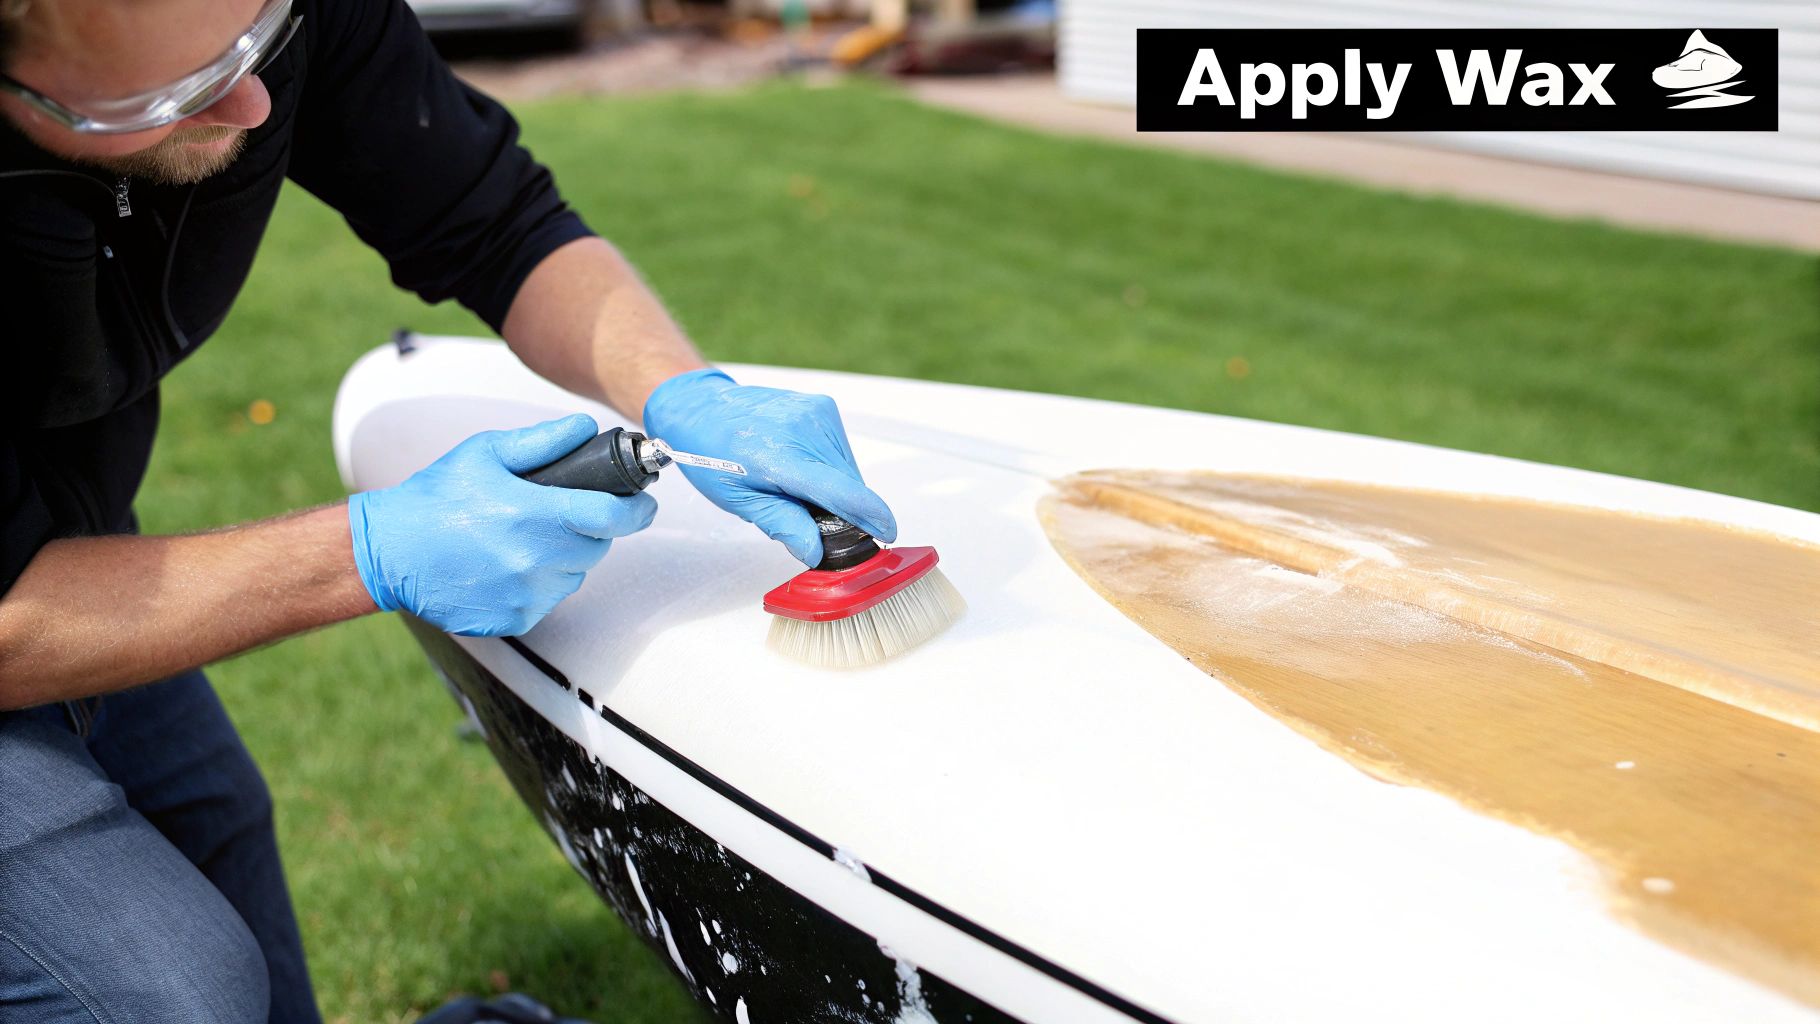
The Art of Hand Application
There's something classic and connected about applying wax by hand. You feel every contour of your boat. For this method, you'll want a quality foam applicator pad. A great little trick is to dampen it just slightly with clean water—this helps the wax spread far more easily and evenly across the surface.
Put a small, dime-sized dollop of wax on your pad. Start working on a small, manageable section, about two-by-two feet. You can use overlapping circular motions or straight-line passes; the key is just to get complete coverage. Apply just enough pressure to spread the product without trying to grind it into the gelcoat. Once that area is covered, move on to the next. This methodical approach ensures you don't miss any spots and gives the wax a consistent drying time across the hull.
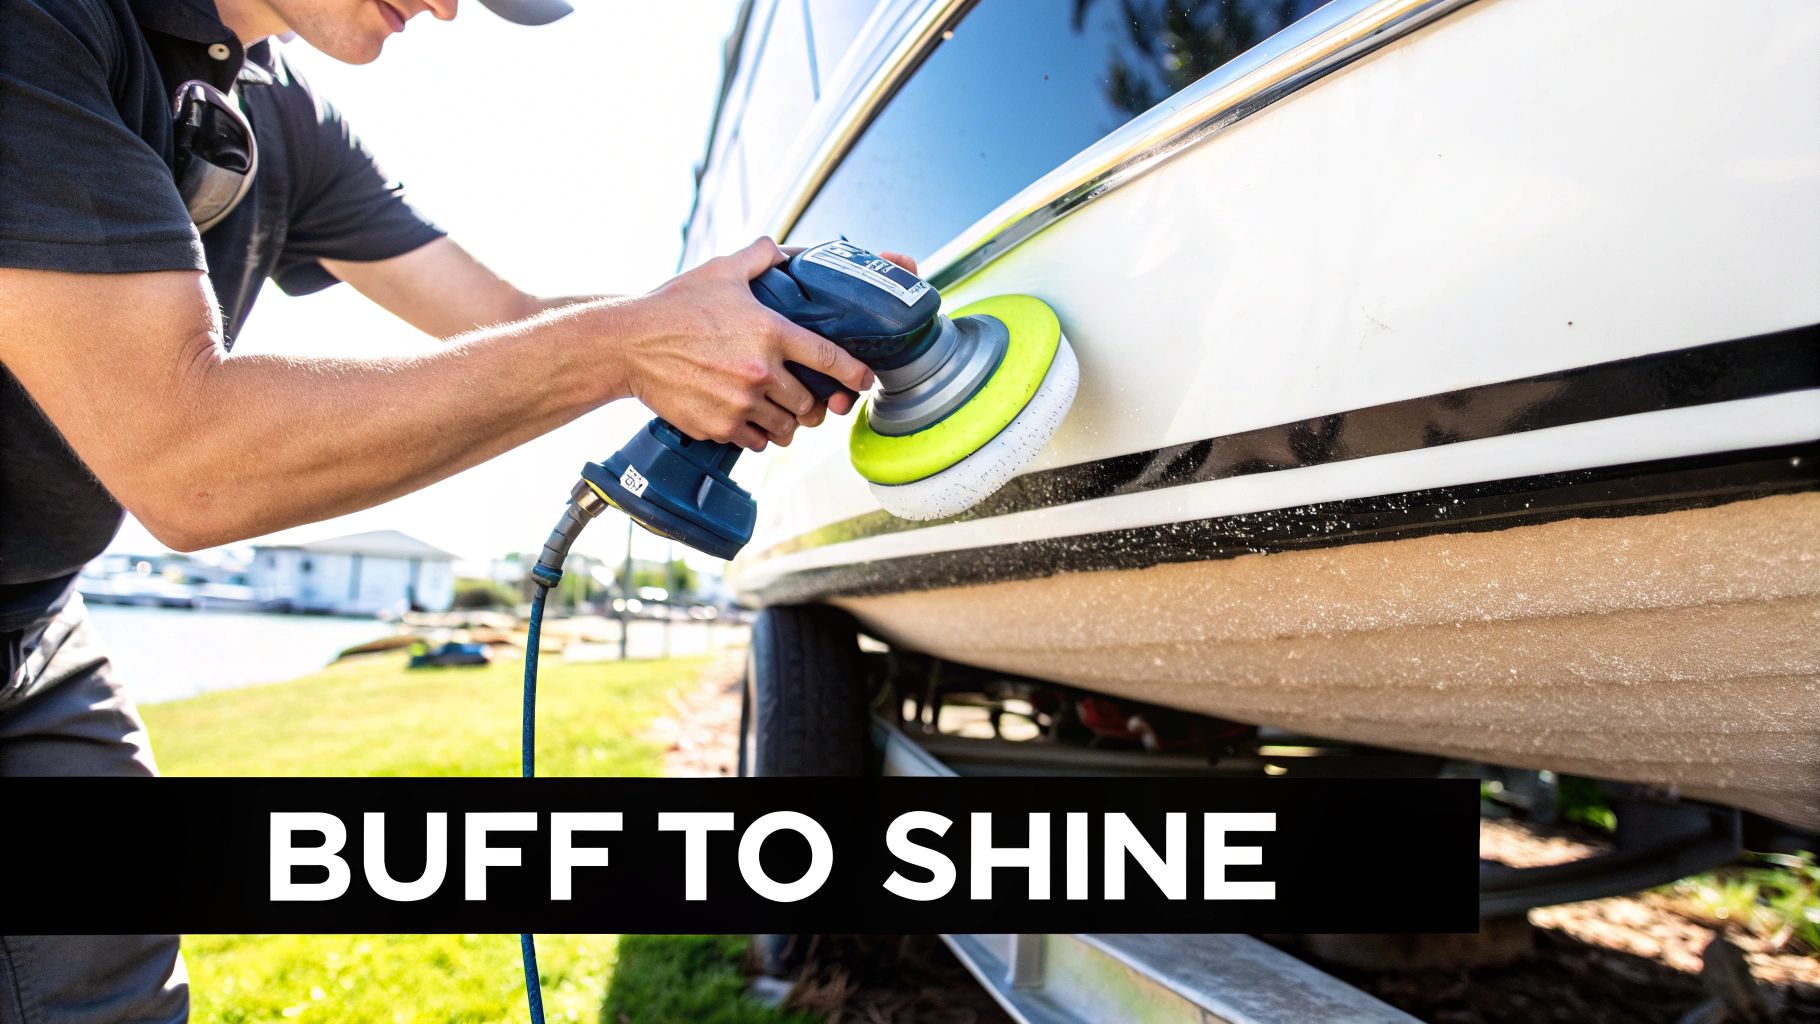
Using a Buffer for Flawless Results
If you have a dual-action (DA) orbital buffer, you can get this done faster and often with a more uniform finish. The machine does the heavy lifting, so your main job is to guide it.
- Pick the Right Pad: You need a soft foam finishing pad. These are designed specifically for applying wax or sealant and won't abrade the gelcoat you just worked so hard to perfect.
- Keep the Speed Low: Set your buffer to its lowest speed, usually a 1 or 2. High speeds are for correction and polishing, not for gently laying down a protective coat.
- Master the Technique: Dab a few small dots of wax directly onto the pad. To avoid slinging product everywhere, touch the pad to the hull before turning the machine on. Move the buffer slowly across the surface in overlapping passes, first horizontally, then vertically. Just let the machine's weight do the work.
Using a machine really cuts down on fatigue and spreads the wax in an incredibly thin, even layer that's perfect for hazing and removal.
The All-Important Swipe Test
So, how do you know when the wax is ready to come off? This is one of the most critical things to learn. If you try to remove it too soon, it’ll just smear. Wait too long, and it can harden like concrete, becoming a nightmare to buff off.
This is where the simple but incredibly effective swipe test comes in.
After about 10-15 minutes (this can vary with temperature and humidity), gently swipe a clean finger across a waxed section. If it smears, it’s not ready. If your swipe reveals a clean, glossy surface underneath and the residue flakes away cleanly, it has perfectly hazed over. This is your green light to start buffing.
Buffing to a Mirror Shine
Once the swipe test gives you the go-ahead, it's time to bring out that shine. Grab a stack of clean, plush microfiber towels. It's crucial to use different towels for removal than you did for application; you don't want to contaminate the surface with wet wax.
Gently wipe away the hazed residue, frequently flipping your towel to a clean side. As one towel gets loaded up with wax, grab a fresh one. This prevents you from simply dragging the residue back over the surface you just cleared.
The effort you put in here is directly tied to the value and pride you get from your boat. Proper maintenance like waxing isn't just a chore; it's a cornerstone of the boating lifestyle. It's a key reason the global boat market, valued at USD 35.01 billion in 2023, continues to grow. These boating market insights here show that owners see regular maintenance as essential to protecting their investment.
For the tricky spots around cleats, railings, and vinyl graphics, use a smaller detail towel and work carefully. And speaking of graphics, make sure you're using a wax that's vinyl-safe, like a modern polymer sealant or a specialized product like Graphix Wax®, to prevent any discoloration.
When you're all done, step back and admire that deep, glossy, professional-grade shine you achieved yourself.
Keeping That Shine: How to Make Your Hard Work Last
You've put in the hours, and now your boat has that incredible, deep shine. The real work is done, but the mission now is to keep that mirror finish looking great for as long as possible. A smart, consistent maintenance routine is the only way to extend the life of your wax job and keep that protective barrier doing its job.
If you do just one thing, make it this: give your boat a quick freshwater rinse after every single trip. This is non-negotiable if you’re in saltwater. When salt water evaporates, it leaves behind tiny, abrasive salt crystals that act like sandpaper on your hull, slowly eating away at the wax and dulling the finish. A simple hosing-down stops this before it starts.
Smart Touch-Ups Between Full Waxes
For those times when a full wash isn't necessary, a quality marine detailer spray becomes your secret weapon. These products are fantastic for quick wipe-downs, easily and safely removing fresh water spots, bird droppings, or light dust before they have a chance to bake in and etch the wax.
Think of a detailer spray as a booster shot for your wax coat. It doesn't just clean; it also amps up the gloss and restores the hydrophobic properties, making water bead up and roll right off again. This one simple step can make a huge difference in how long your base coat of wax holds up.
My Two Cents: I always keep a bottle of marine detailer and a couple of clean microfiber towels stashed on the boat. A quick five-minute wipe-down of the high-exposure spots—like the gunwales and transom—while you're tidying up at the dock makes a world of difference over the season.
Setting a Realistic Re-Waxing Schedule
So, how often do you have to go through this whole process again? Honestly, there’s no magic number. It all comes down to your boat's environment and how you use it.
- Sun Exposure: A boat that lives under a cover needs waxing far less often than one baking in the Florida sun year-round. UV rays are the number one enemy of wax.
- Water Type: Saltwater is notoriously harsh on protective coatings. If you're a saltwater boater, you’ll be waxing more often than your freshwater counterparts.
- Storage: A boat kept in a slip is under constant attack from the elements. A trailered boat that gets covered between outings will hold its wax protection much, much longer.
As a general rule, plan to re-wax at least once a season. For a boat that sits in a saltwater slip in a sunny climate, you might be looking at waxing every 3-4 months. On the other hand, a covered, freshwater boat might only need it once a year.
The best indicator is the water beading. When you rinse the hull and the water starts to "sheet" instead of forming tight little beads, you know the wax is failing. That's your cue it’s time for a fresh coat. For more deep-dive strategies, our library of boat maintenance articles has plenty of additional expert advice.
Answering Your Top Boat Waxing Questions
Even after you've got the basics down, you’re bound to run into a few tricky situations out on the driveway. Knowing the steps is one thing, but knowing how to handle the curveballs is what separates the novices from the seasoned pros. Let's tackle some of the most common questions I hear from other boaters.
One of the biggest headaches can be dealing with that old, stubborn layer of wax that just won't come off. If your usual boat soap isn’t doing the trick, you'll need something stronger. A dedicated wax-stripping wash or a gelcoat-safe solvent will dissolve that old layer without damaging the finish, giving your new wax a perfectly clean surface to grab onto.
Dealing with Spills and Sensitive Surfaces
So, what do you do when you inevitably get wax on a non-skid deck surface? It happens to everyone, and it can make those areas dangerously slippery. The key is to act fast. Grab a soft-bristle brush and a quality all-purpose boat cleaner to scrub the wax out of the texture. Don't be afraid to put a little elbow grease into it—safety is on the line.
Another classic "uh-oh" moment involves waxing over vinyl decals and pinstriping. Be careful here. Many older, traditional waxes have solvents that can fade, dry out, or even lift your graphics over time. You can either meticulously tape off all your vinyl (which takes forever) or switch to a modern, vinyl-safe product. Polymer sealants are a great choice, as are specialized products like Graphix Wax®, which are designed to protect and shine vinyl without causing any harm.
My Two Cents: If wax happens to dry on a vinyl seat or cushion, don't panic. The last thing you want to do is grab a harsh chemical. First, try working it off with a soft cloth and a dedicated cleaner like VinyLIFE®. The trick is always to use a product meant for that specific material to avoid making the problem worse.
Timing Your Wax Job: Pre- and Post-Season
A question that comes up a lot is whether it’s okay to wax a boat right before putting it away for the winter. Not only is it okay, it’s a brilliant idea. A fresh, durable coat of wax is a crucial part of any good winterization plan. It acts as a tough barrier against dampness, dust, and grime while your boat is in storage. Think of it as putting a protective coat on your investment before a long nap.
Knowing how to handle these common hiccups will make the whole process smoother and a lot less frustrating. You'll work faster, avoid common mistakes, and get a professional-looking shine that truly protects your hull.
For more expert reviews, DIY guides, and in-depth boating knowledge, explore everything Boating Articles has to offer. Find the best information to protect your vessel and enjoy your time on the water at https://boating-articles.com.