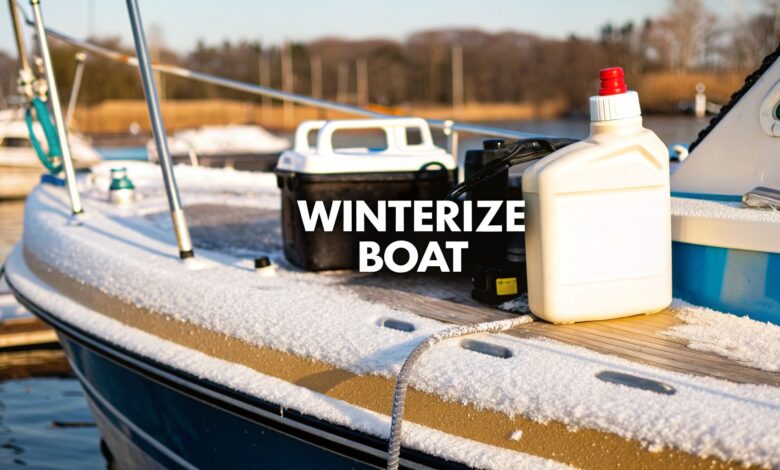
As the boating season winds down, the most crucial task for any boat owner begins: winterization. Failing to properly prepare your vessel for the cold months can lead to catastrophic and expensive damage, from cracked engine blocks to ruined fuel systems and mildew-infested interiors. A comprehensive winterize boat checklist is not just a series of suggestions; it is your essential roadmap to protecting your investment and ensuring a smooth, trouble-free launch next spring.
This guide goes beyond the basics, providing a detailed, step-by-step roundup of the seven most critical areas you must address. We'll cover everything from stabilizing your fuel and protecting your engine's cooling system to preserving your batteries and safeguarding the hull. We provide actionable insights and expert tips drawn from decades of marine maintenance practices.
Following this checklist diligently will save you from costly repairs and give you peace of mind, knowing your boat is safely hibernating and will be ready for your next adventure when the water calls again. This process is the single most important maintenance routine you can perform to guarantee the longevity and reliability of your boat for years to come.
1. Fuel System Stabilization
Overlooking your fuel system is one of the most common and costly mistakes a boat owner can make during winter storage. Untreated gasoline, especially ethanol-blended fuel, can degrade in as little as 30-60 days. This degradation process, known as oxidation, leads to the formation of varnish, gum, and other corrosive deposits that can clog fuel lines, injectors, and carburetor jets, setting you up for a frustrating and expensive start to the next boating season. Proper fuel stabilization is a non-negotiable part of any comprehensive winterize boat checklist.
Why Stabilize and How It Works
Fuel stabilizer is a chemical compound that acts like an antioxidant for your gasoline. It bonds with fuel molecules to prevent them from breaking down and forming harmful deposits. At the same time, it absorbs any water present in the fuel, preventing it from separating and causing corrosion or freezing in the fuel lines during cold snaps.
The process is straightforward: add the correct amount of stabilizer to your fuel tank and then run the engine. This circulates the treated fuel mixture not just through the tank, but through the entire system, including fuel lines, filters, fuel pumps, and carburetors or fuel injectors. This ensures every component is coated and protected.
Expert Insight: According to marine service centers like those endorsed by Yamaha and Mercury Marine, a staggering number of "no-start" issues in the spring are directly linked to unstabilized fuel. Implementing this simple step can prevent over 90% of these common fuel-related problems.
Actionable Steps for Fuel Stabilization
To properly prepare your fuel system for its long winter nap, follow these critical steps:
- Add Stabilizer Before Your Final Fill-Up: Pour the fuel stabilizer into your tank before adding the last tank of fuel for the season. This allows the incoming gasoline to thoroughly mix the stabilizer throughout the tank. Use a marine-specific product like STA-BIL Marine or a similar brand recommended by your engine manufacturer.
- Fill the Tank: Fill your fuel tank to approximately 95% capacity. A full tank leaves very little room for air. Less air means less moisture can condense inside the tank as temperatures fluctuate, which is a primary cause of water contamination and corrosion. Avoid filling to 100%, as fuel needs a small amount of room to expand with temperature changes.
- Run the Engine: After adding the stabilizer and filling the tank, run your boat's engine for 15-20 minutes. This is essential to circulate the treated fuel through every part of the system, ensuring complete protection from tank to engine. You can do this in the water on your final trip or while connected to a water supply on land.
2. Engine Cooling System Winterization
Ignoring your engine's cooling system in a freezing climate is a gamble that can lead to catastrophic failure. Water left inside the engine block, exhaust manifolds, or raw water passages will expand as it freezes, exerting enough force to crack solid cast iron. This can result in thousands of dollars in repairs or even a complete engine replacement, making it one of the most critical tasks on any winterize boat checklist. Properly draining and protecting the cooling system is essential to safeguard your investment.
Why Winterize the Cooling System and How It Works
The primary goal is to replace all raw water in the cooling passages with non-toxic marine antifreeze. This specialized antifreeze has a much lower freezing point than water and contains corrosion inhibitors that protect the internal metal surfaces of your engine throughout the winter. Failing to do this can lead to cracked engine blocks or manifolds, which are among the most expensive repairs a boat owner can face.
The process involves first draining every drop of water from the system. For sterndrive and inboard engines, this means opening petcocks or removing drain plugs on the engine block and manifolds. For outboard engines, it's a matter of tilting the motor down to allow all water to drain out naturally. Once drained, the system is filled with marine antifreeze, which is then circulated to ensure it reaches every nook and cranny.
Expert Insight: Professional marina services, like those following Mercruiser procedures, report that freeze damage from improperly drained cooling systems is a leading cause of major engine work in the spring. A single night of freezing temperatures is all it takes to cause irreversible damage to an unprotected engine.
Actionable Steps for Cooling System Protection
To ensure your engine is safe from freeze damage, follow these essential steps:
- Drain All Water Completely: Locate and open all drain plugs or petcocks on your engine block and exhaust manifolds. On some models, you may need to poke a wire into the drain holes to clear out any sediment blocking the flow. Keep the plugs in a labeled bag so you don't lose them. For outboards, trim the engine all the way down.
- Fill with Marine Antifreeze: Use only a non-toxic propylene glycol marine antifreeze, often pink in color. Never use ethylene glycol (automotive) antifreeze, as it is highly toxic to aquatic life and will be discharged into the water upon spring start-up.
- Circulate the Antifreeze: Run the engine just long enough for the antifreeze to circulate through the cooling system. You'll know it's fully circulated when you see the colored antifreeze coming out of the exhaust outlet. This confirms the entire system is protected.
This infographic illustrates the fundamental process for winterizing an inboard or sterndrive engine's cooling system.
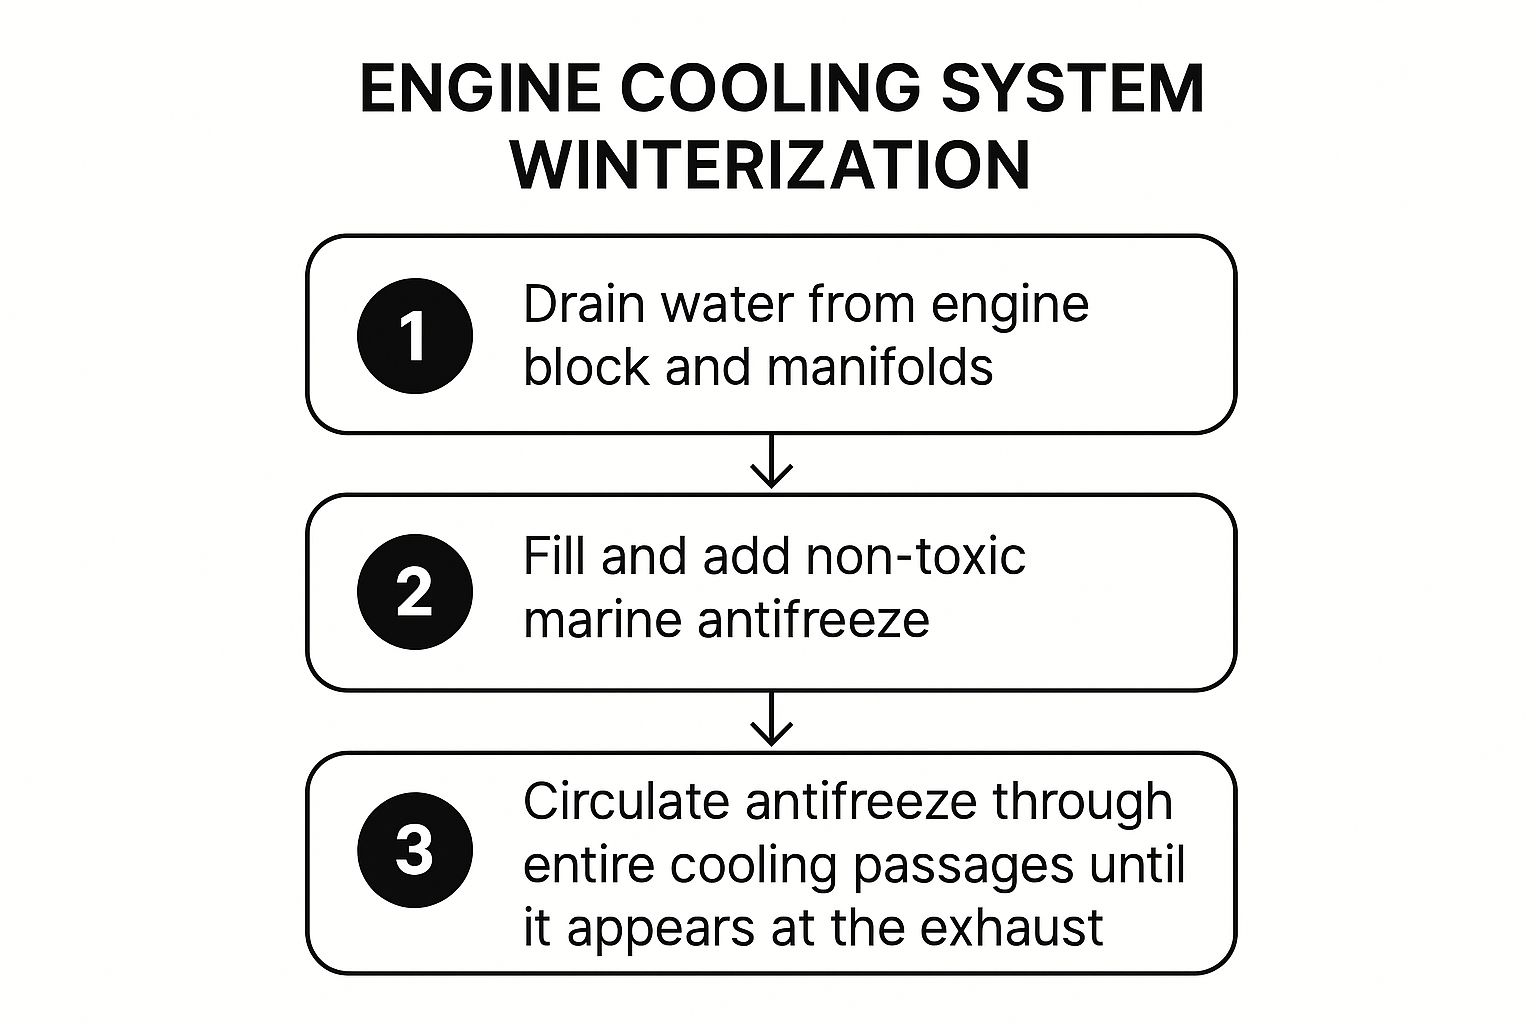
The visualization underscores that this is a sequential process; skipping the initial draining step or failing to fully circulate the antifreeze will leave the engine vulnerable to damage.
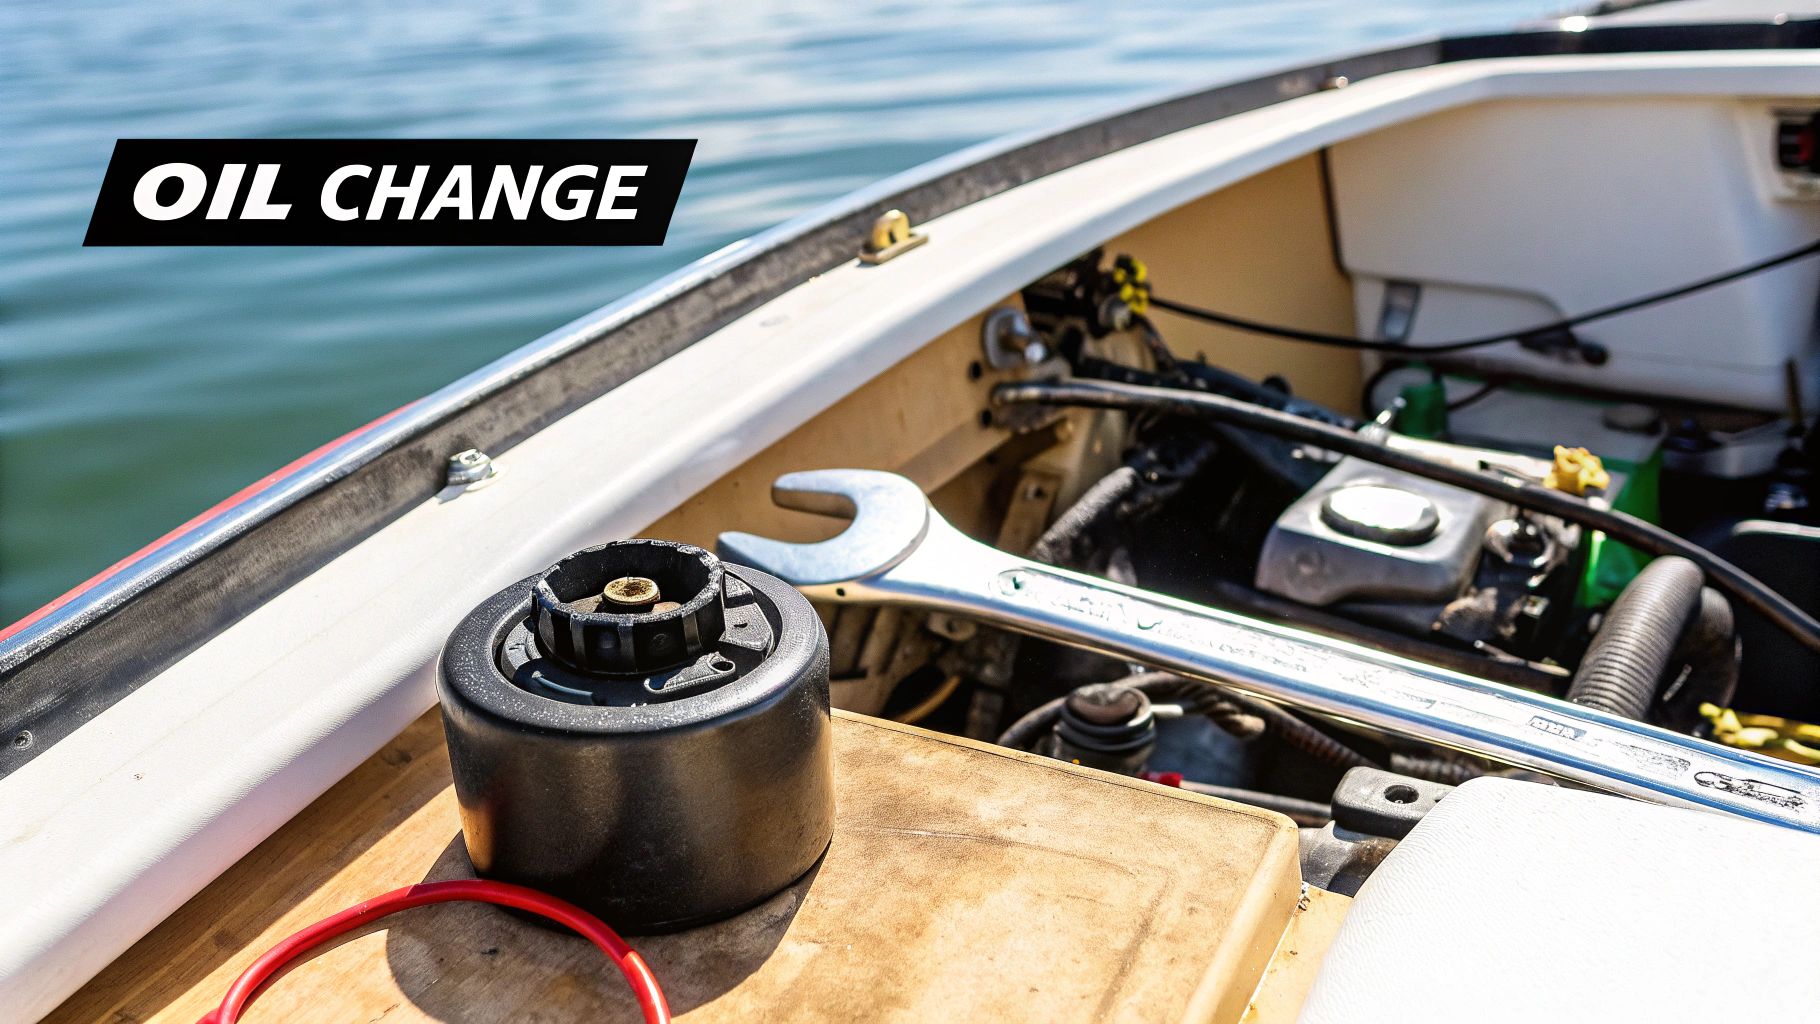
3. Oil and Filter Changes
Leaving used, contaminated engine oil in your boat over the winter is akin to leaving a corrosive cocktail sitting in the heart of your engine. During operation, engine oil accumulates moisture, unburnt fuel byproducts, and acidic compounds. If left to sit for months, these contaminants can etch bearings, cylinder walls, and other critical internal components, leading to premature wear and potential failure. Including an oil and filter change in your winterize boat checklist is a fundamental step in preserving engine health and ensuring a smooth start next season.
Why Change Oil Before Storage
Changing the oil before winter storage removes these harmful, acidic contaminants. Fresh, clean oil contains active additives that coat internal surfaces with a protective film, guarding against rust and corrosion that can form as condensation builds inside the engine during temperature swings. It ensures that when you first turn the key in the spring, the engine is lubricated with high-quality oil, not a degraded and damaging sludge.
The process involves completely draining the old oil and replacing it, along with the oil filter. The filter traps particulates and sludge, so replacing it is just as crucial as changing the oil itself. Using a high-quality, marine-grade oil from brands like Quicksilver or Valvoline Marine ensures you have the correct viscosity and additive package designed for the harsh marine environment.
Expert Insight: Data from marine service centers consistently shows that engines receiving pre-storage oil changes have a significantly lower rate of springtime mechanical failures. For instance, some outboard engines have demonstrated up to a 40% longer service life when this simple maintenance task is performed annually before winterization.
Actionable Steps for Oil and Filter Changes
To protect your engine's internal components during its long winter layup, follow these essential steps:
- Warm the Engine First: Run the engine for about 15 minutes before draining the oil. This warms the oil, lowers its viscosity, and allows contaminants to be suspended, ensuring they are drained out more completely. This step can be combined with running the engine to circulate stabilized fuel.
- Drain and Replace: Following your manufacturer's instructions, completely drain the old oil into a suitable container. Replace the drain plug, then remove and replace the oil filter. Remember to apply a thin coat of new oil to the new filter's gasket for a proper seal.
- Refill with Marine-Grade Oil: Refill the engine with the specific type and weight of marine-grade oil recommended by your engine's manufacturer. Using automotive oil is not recommended, as it lacks the specialized corrosion inhibitors needed for marine applications. For a deeper dive into this topic, you can learn more about proper boat motor maintenance on boating-articles.com.
- Check the Level: After refilling, check the oil level with the dipstick. Start the engine for about 30 seconds to circulate the new oil into the filter, then shut it down, wait a few minutes, and recheck the level, topping off as necessary to reach the "full" mark.
4. Fresh Water System Preparation
The water in your boat’s fresh water system, from the holding tank to the faucets, poses a significant threat during a winter freeze. As water turns to ice, it expands by approximately 9%, exerting immense pressure that can easily crack pipes, split water heater tanks, and destroy pumps. A proper fresh water system winterization is an essential part of any comprehensive winterize boat checklist, protecting your plumbing from catastrophic and expensive damage.
Why Winterize the Plumbing and How It Works
Winterizing your potable water system involves a two-stage process: first, completely draining the existing water, and second, replacing it with non-toxic marine antifreeze. This ensures that any residual liquid in the lines will not freeze, expand, and cause damage. This process protects every component, including the water tank, pump, accumulator, hot water heater, and all faucets and fixtures like showers or deck washdowns.
The goal is to systematically push antifreeze through every single part of the plumbing. By opening each fixture one by one until the pink antifreeze flows out, you confirm that the entire line leading to that outlet is filled and protected. This method is crucial for boats with complex plumbing, such as cabin cruisers or sailboats with full galleys and heads.
Expert Insight: Marine insurance claims data consistently shows that freeze damage to plumbing systems is one of the top preventable winter claims. Professional yacht services, like those using Camco or West Marine products, emphasize that simply draining the system is not enough; residual water trapped in low points or within pump housings can still freeze and cause major damage.
Actionable Steps for Fresh Water System Preparation
To safeguard your boat’s plumbing from the ravages of winter, follow these critical steps:
- Drain All Water Completely: Start by opening the drain valve on your fresh water tank and let it empty entirely. Turn on the water pump and open all faucets (both hot and cold) to drain the lines. Don't forget to drain the hot water heater separately; most have a dedicated drain plug or valve at the bottom.
- Introduce Non-Toxic Antifreeze: Close all drains and faucets. Pour several gallons of a non-toxic, propylene glycol-based marine antifreeze into your empty fresh water tank. It's crucial to use a product specifically labeled as safe for potable water systems, not engine antifreeze.
- Circulate the Antifreeze: Turn the water pump back on to pressurize the system with antifreeze. Go to each faucet, starting with the one furthest from the pump, and open the hot and cold taps one at a time. Let them run until you see a steady flow of pink antifreeze, then close them. Repeat this for every faucet, shower head, and washdown spigot on your boat. Don't forget to flush the toilet until antifreeze appears in the bowl.
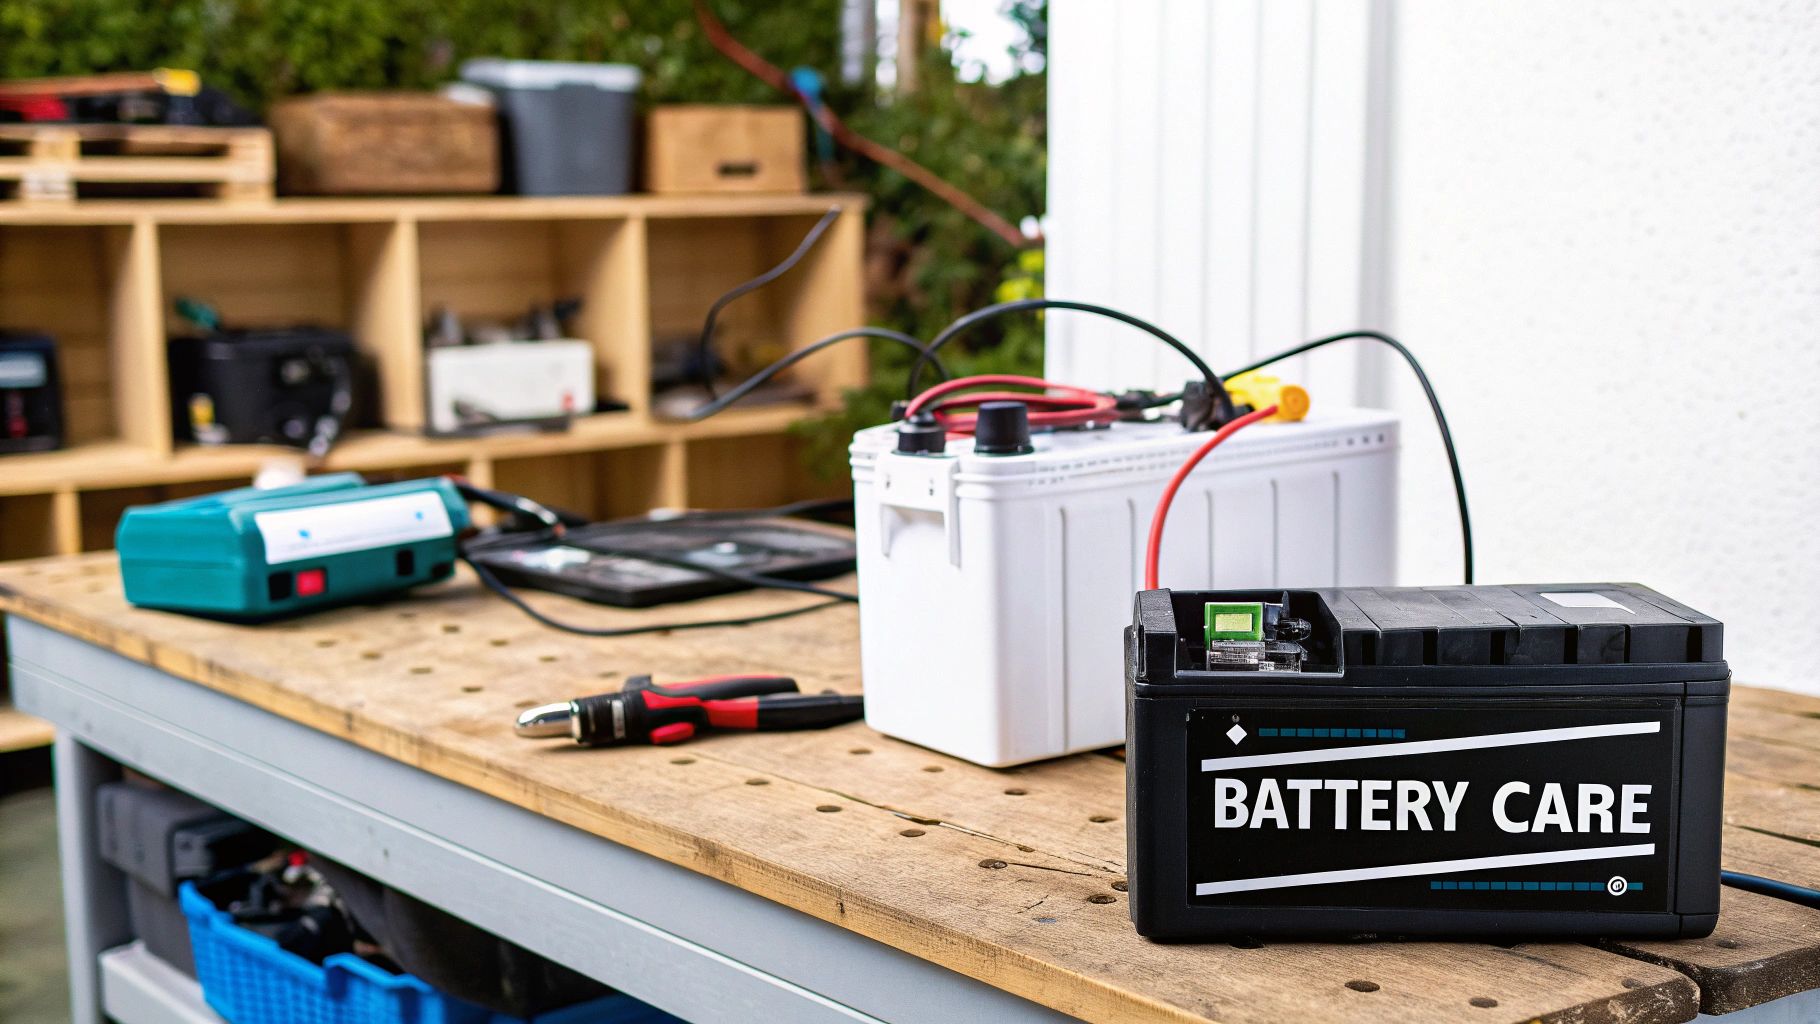
5. Battery Maintenance and Storage
A boat's battery is its heart, and leaving it neglected over the winter is a surefire way to cause irreversible damage and a dead start in the spring. Cold temperatures are notoriously hard on lead-acid batteries, accelerating self-discharge and increasing the risk of the electrolyte freezing and cracking the battery case. Proper battery care is a critical part of any winterize boat checklist, ensuring your power source is healthy and ready for another season of reliable service.
Why Maintain and How It Works
During winter, an uncharged or partially charged battery can suffer from sulfation, a process where lead sulfate crystals build up on the battery plates. This build-up reduces the battery's ability to hold a charge and can eventually lead to complete failure. A fully charged battery, however, has a much lower freezing point than a discharged one, protecting it from physical damage in freezing climates.
The goal of winter storage is to keep the battery fully charged, clean, and safe. This involves either removing the battery for controlled indoor storage or connecting it to a "smart" maintenance charger that keeps it topped off without overcharging. This proactive approach prevents sulfation, freezing, and premature replacement costs.
Expert Insight: According to leading manufacturers like NOCO and Battery Tender, a well-maintained deep cycle battery can last over seven years. In contrast, a battery left to self-discharge and potentially freeze over a single winter may lose up to 50% of its capacity or fail entirely.
Actionable Steps for Battery Maintenance
To ensure your batteries survive the off-season and perform flawlessly next year, follow these essential steps:
- Clean and Inspect: Disconnect the battery terminals (negative first, then positive). Clean any corrosion from the terminals and cable ends using a wire brush and a solution of baking soda and water. Once clean and dry, apply a terminal protector spray to prevent future corrosion. Inspect the battery case for any cracks or leaks.
- Charge Fully: Use a multi-stage battery charger to bring your batteries to a 100% full charge. This is the single most important step in preventing sulfation and freezing. Making sure you have the right power source is key, and you can get help picking the right batteries for your boat on boating-articles.com.
- Decide on Storage: You have two primary options:
- Remove and Store: If possible, remove the batteries and store them in a cool, dry place that stays above freezing, like a garage or basement. Place them on a piece of wood or plastic, not directly on a concrete floor which can accelerate discharge.
- Store Onboard: If leaving the batteries on the boat, ensure they are fully charged and disconnected from all boat systems to prevent parasitic drain. Better yet, connect them to a high-quality "smart" trickle charger or battery maintainer that will automatically monitor and maintain the charge level throughout the winter.
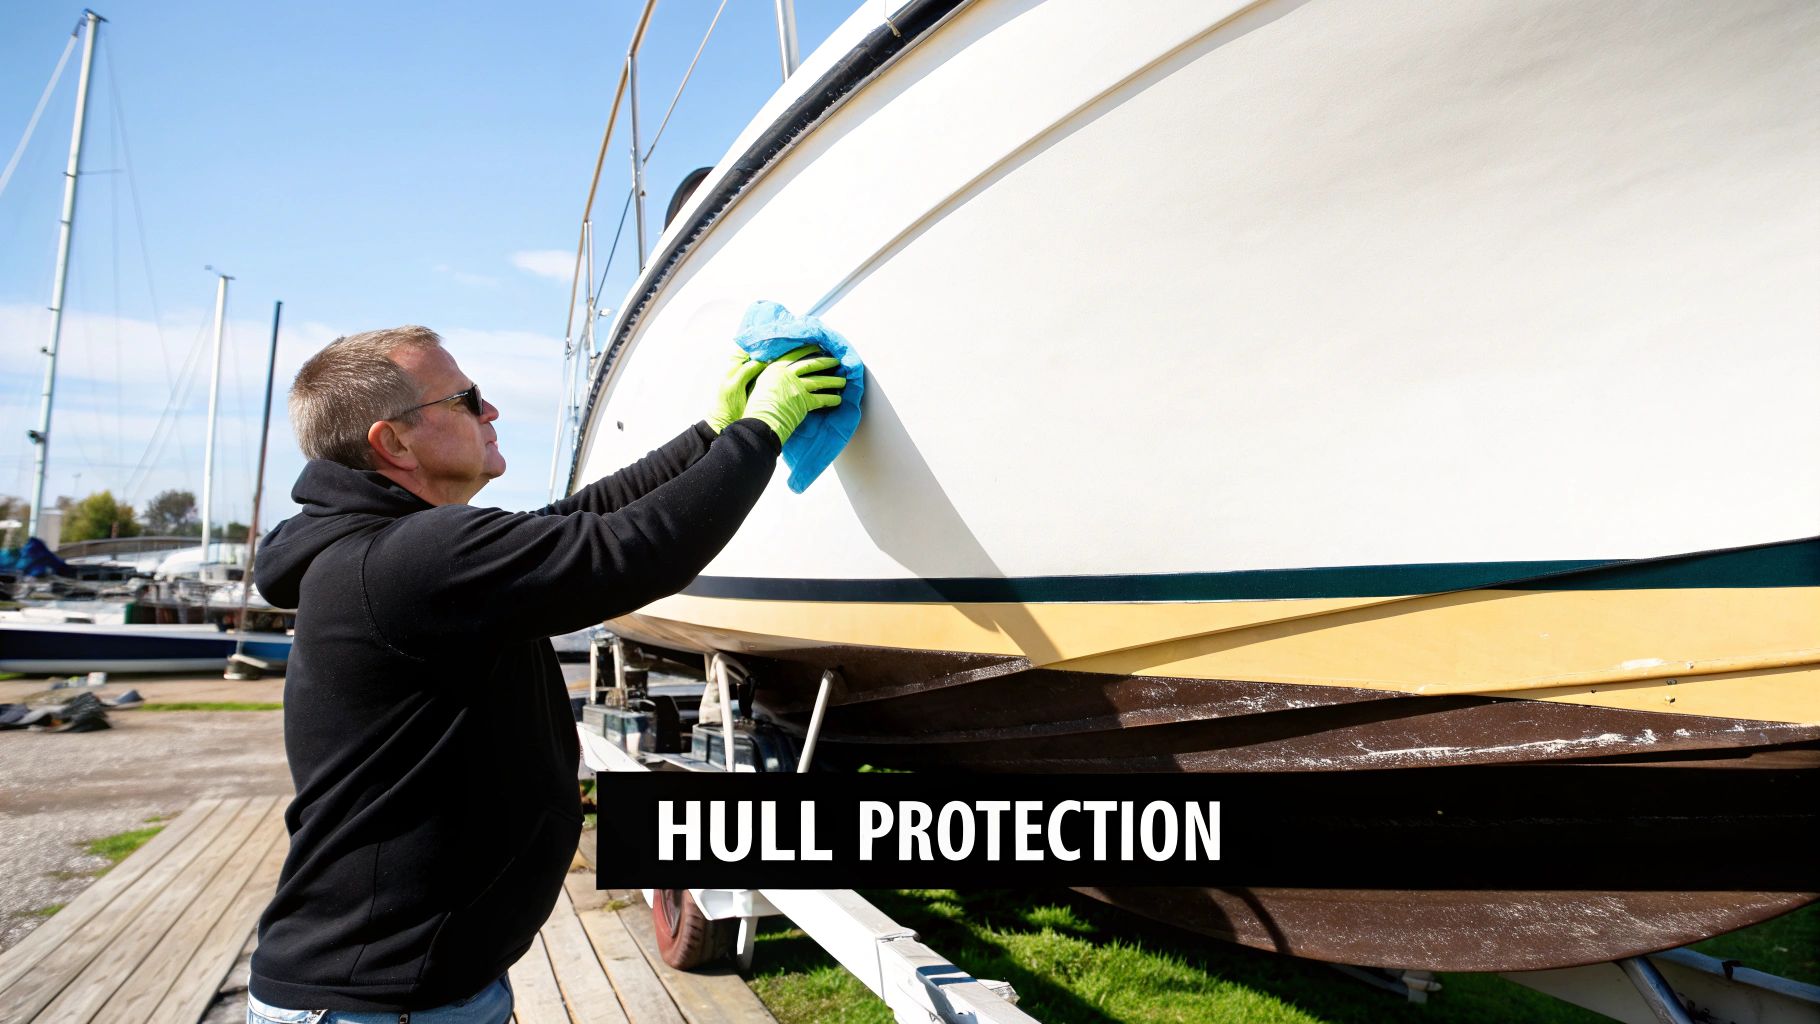
6. Hull and Exterior Protection
The harsh winter environment can be incredibly damaging to your boat's exterior, leading to faded gelcoat, cracked vinyl, and accelerated oxidation. Failing to protect the hull and other exposed surfaces is an invitation for UV radiation, acid rain, bird droppings, and freeze-thaw cycles to degrade your vessel's finish and structural integrity. A thorough cleaning and application of protective treatments is a vital part of any winterize boat checklist, preserving both its value and appearance.
Why Protect the Exterior and How It Works
Your boat's gelcoat or paint is its first line of defense against the elements. Over the winter, dirt and grime can get ground into the surface, while UV rays continue to break down the finish, even on cloudy days. A high-quality marine wax or polymer sealant creates a durable, sacrificial barrier over the hull. This layer repels water, prevents contaminants from embedding in the pores of the gelcoat, and blocks harmful UV radiation.
Similarly, treating vinyl seats, canvas covers, and other plastics with specific UV protectants keeps them from becoming brittle and cracked. This proactive step ensures that when you uncover your boat in the spring, it looks as good as when you put it away, not aged and weathered.
Expert Insight: Marine detailers from leading brands like 3M Marine and Meguiar's Marine emphasize that a single coat of quality paste wax can provide up to six months of protection. This simple act is the difference between a fiberglass boat that still has a showroom shine after 10 years and one that looks chalky and dull after just a few seasons.
Actionable Steps for Hull and Exterior Protection
To shield your boat from winter's assault, follow these essential steps for a complete exterior defense:
- Wash and Clean Thoroughly: Before applying any protectants, give your boat a top-to-bottom wash. Use a marine-grade boat soap to remove salt, grime, and any stains from the hull, deck, and superstructure. Pay special attention to the waterline to remove any stubborn "scum lines."
- Apply Wax or Sealant: Once the boat is completely dry, apply a high-quality marine wax or polymer sealant to all fiberglass and painted surfaces. Work in small, manageable sections, applying the product according to the manufacturer's instructions. This creates a crucial protective barrier against moisture and UV damage.
- Treat All Exposed Surfaces: Don't forget the details. Use a dedicated UV protectant spray on all vinyl upholstery, rubber seals, and plastic components. For any canvas, ensure it is clean and dry, then consider applying a water-repellent treatment.
- Cover It Correctly: Use a high-quality, breathable boat cover from a reputable brand like Carver. A breathable cover prevents moisture from getting trapped underneath, which can lead to mold and mildew. Ensure the cover is well-supported with a frame or support poles to prevent snow and water from pooling and causing damage.
7. Cabin and Interior Preparation
Failing to properly prepare your boat's interior before closing it up for winter is an open invitation for mold, mildew, pests, and foul odors. The sealed, dark environment of a stored boat cabin is a perfect breeding ground for moisture-related problems and an attractive shelter for rodents. A comprehensive approach to interior preparation is a vital part of any winterize boat checklist, ensuring the space remains fresh, clean, and damage-free until spring.
Why Interior Prep is Crucial and How It Works
A boat's cabin contains numerous materials like upholstery, wood, carpet, and canvas that can absorb and hold moisture. As temperatures fluctuate, condensation forms, creating the ideal environment for mold and mildew growth which can ruin fabrics and create persistent, musty smells. Furthermore, any crumbs or food remnants left behind will attract insects and rodents, who can cause significant damage by chewing through wiring, upholstery, and even plastic components.
Proper interior preparation involves a multi-pronged strategy: deep cleaning to remove attractants, moisture control to prevent fungal growth, and pest deterrence to keep unwanted guests out. This ensures that when you open your boat in the spring, the cabin is as fresh and welcoming as when you left it.
Expert Insight: Marine surveyors frequently report that mold and mildew damage, often not covered by insurance, is one of the most preventable yet common issues found during pre-season inspections. A few hours of cleaning and moisture control can save hundreds or even thousands of dollars in professional remediation and reupholstery costs.
Actionable Steps for Interior Preparation
To protect your cabin and its contents from the rigors of winter storage, follow these essential steps:
- Remove Everything Organic: This is the most critical step. Take off all food, drinks, bedding, towels, life jackets, and clothing. These items retain moisture and can attract pests. Even sealed food packages should be removed, as determined rodents can easily chew through them.
- Deep Clean and Dry: Thoroughly vacuum every corner, locker, and bilge space. Clean all surfaces, including countertops, upholstery, and floors, with a suitable marine cleaner to remove dirt, salt, and spills. If you shampoo carpets or upholstery, ensure they are 100% dry before closing up the boat. Addressing your flooring correctly is a key part of this process; choosing the right boat flooring can make this seasonal cleaning much easier.
- Control Moisture and Airflow: Place large moisture absorbers, like DampRid buckets or similar products, in the main cabin, head, and any other large enclosed areas. To promote air circulation and prevent moisture from getting trapped, prop open all interior doors, cabinets, lockers, and refrigerator doors.
- Deter Pests: Place pest deterrents such as peppermint oil-soaked cotton balls, scented dryer sheets, or commercially available rodent repellents in lockers, drawers, the engine bay, and along potential entry points. Do not use poison baits, as pests may die inside the boat, creating an even worse problem.
Winterize Boat Checklist Comparison
| Winterization Step | Implementation Complexity 🔄 | Resource Requirements ⚡ | Expected Outcomes 📊 | Ideal Use Cases 💡 | Key Advantages ⭐ |
|---|---|---|---|---|---|
| Fuel System Stabilization | Moderate – requires timed steps and compatible stabilizers | Fuel stabilizer, ethanol-free fuel preferred | Prevents fuel degradation, protects engine components | Boats stored over winter, seasonal use | Reliable startup, prevents fuel system damage |
| Engine Cooling System Winterization | High – complete drainage, antifreeze circulation required | Marine-grade non-toxic antifreeze, professional tools may be needed | Prevents freeze damage to engine block and cooling system | Boats in freezing climates | Avoids costly engine repairs, warranty compliance |
| Oil and Filter Changes | Moderate – requires warm engine and disposal facilities | Marine-grade oil, oil filters, disposal setup | Prevents internal engine corrosion, extends engine life | All boats preparing for storage | Reduces contaminants, ensures spring lubrication |
| Fresh Water System Preparation | Moderate to High – full drainage and antifreeze fill | Non-toxic, food-grade marine antifreeze | Prevents freeze damage and bacterial growth | Boats with potable water systems | Protects plumbing, maintains system integrity |
| Battery Maintenance and Storage | Moderate – cleaning, charging, and storage environment | Maintenance chargers, temperature-controlled space | Extends battery life, prevents sulfation and freezing | Boats with removable or onboard batteries | Increases battery lifespan, reliable startup |
| Hull and Exterior Protection | Moderate to High – thorough cleaning and protective treatments | Quality waxes, UV covers, ventilation setups | Prevents oxidation, environmental damage, maintains appearance | All boats stored outdoors or indoors | Maintains value, reduces prep time in spring |
| Cabin and Interior Preparation | Moderate – cleaning, moisture, and pest control | Moisture absorbers, pest deterrents, ventilation | Prevents mold, mildew, pests, and interior damage | Boats with enclosed cabins and interiors | Protects upholstery, electronics, and air quality |
From Checklist to Launch: Your Path to a Perfect Spring
Navigating the off-season successfully is just as crucial as navigating open waters. This comprehensive winterize boat checklist is more than a simple to-do list; it's a strategic blueprint for safeguarding your vessel against the corrosive effects of cold, moisture, and neglect. By methodically working through each critical system—from stabilizing your fuel to flushing your engine, and from draining the plumbing to deep cleaning the hull—you are actively investing in your boat's future reliability and resale value. The small, diligent steps you take now directly prevent the catastrophic and costly failures that can surface in the spring.
Think of this process not as an end-of-season chore, but as the very first step in preparing for your next launch. A cracked engine block from frozen water, a mold-infested cabin, or a corroded fuel line are all preventable issues that can sideline your boat for weeks, if not months, consuming your time and your budget. Mastering these winterization tasks transforms your relationship with your boat from reactive to proactive.
Key Takeaways for a Flawless Off-Season
To ensure you’ve covered all your bases, let's revisit the core principles that underpin a successful winterization:
- Eliminate Water: Water is your primary adversary. Whether it's in the engine's cooling system, the freshwater tanks, or pooling on the deck under a poorly fitted cover, trapped moisture that freezes will expand with incredible force, causing irreversible damage.
- Stabilize and Protect: Fuel degrades, batteries lose their charge, and metal components corrode. Using fuel stabilizers, disconnecting and tending to your batteries, and applying protective coatings are non-negotiable steps to preserve these vital systems.
- Cleanliness is Protection: Dirt, salt, and grime are not just cosmetic issues. They hold moisture, promote mildew growth, and can permanently stain or damage surfaces. A thorough cleaning, inside and out, is a fundamental layer of defense.
Pro Tip: Create your own physical checklist and tick off each item as you complete it. Take photos of your work, especially complex steps like engine fogging or plumbing bypasses. This documentation will be invaluable next spring when you reverse the process.
Ultimately, completing this winterize boat checklist is your best insurance policy. The peace of mind you gain knowing your boat is securely tucked away and protected is immeasurable. When the first warm days of spring arrive, you won't be greeted with a long list of unexpected repairs and frustrating delays. Instead, you'll be confident, prepared, and ready for a smooth commissioning process, ensuring you're one of the first to hit the water and make the most of the upcoming season. Your diligence today guarantees a seamless and enjoyable start to your next boating adventure.
Ready to dive deeper into advanced maintenance and become a more knowledgeable boat owner? Explore the extensive library of guides, tutorials, and expert tips at Boating Articles. Our resources cover everything from year-round upkeep to specific component repair, helping you master every aspect of boat care. Visit Boating Articles to continue your journey.