Giving your boat a facelift with new carpet is a satisfying DIY project. It instantly spruces up the entire look and feel of the deck. With patience and attention to detail, any boat owner can achieve a professional result.
The key is to gather the right tools and pick a durable marine-grade carpet. You must also properly prep the deck surface. Following these steps will ensure a great outcome.
Getting Your Tools and Materials Ready
A project can go sideways without the right gear from the start. A boat carpet installation is a smooth process if you're prepared. This means thinking beyond just carpet and glue to gather specific tools.
Your first big choice is the carpet itself. You need something that handles the harsh marine environment. This means excellent UV resistance, a durable material, and the right backing.
A true marine carpet is built to handle sun, moisture, and foot traffic. If you're still weighing options, our guide on choosing boat flooring for your vessel is a great place to start.
Don't Skimp on the Supplies
After the carpet, your most important purchase is the adhesive. A high-quality, marine-grade adhesive is non-negotiable. Do not grab just any glue from the hardware store.
Marine glues are formulated to create a tough, waterproof bond. This bond won’t break down under the stress of sun, salt, and temperature swings. It is what keeps your carpet firmly in place for years.
The demand for these materials is rising. The global boat carpet market was valued at around USD 350 million and is projected to grow. This is fueled by more people getting into boating and innovations in marine-grade materials. You can see a full market analysis on verifiedmarketreports.com.
To make sure you have everything you need, I've put together a checklist. It covers the essential tools and materials for the job.
Essential Tools and Materials Checklist
| Category | Item | Expert Tip |
|---|---|---|
| Removal & Prep | Stiff-bristled brush | Great for scrubbing away loose debris after scraping. |
| Scraper or putty knife | A sharp, sturdy scraper is your best friend for removing old glue. | |
| Acetone or adhesive remover | Test a small, inconspicuous area first to ensure it won't damage the fiberglass. | |
| Shop vacuum | Absolutely essential for a clean surface, which is critical for good adhesion. | |
| Cutting & Fitting | Heavy-duty utility knife | Have plenty of fresh, sharp blades. A dull blade will tear the carpet. |
| Measuring tape | Measure twice, cut once! Accuracy here prevents wasted material. | |
| Chalk line or marker | A silver or white marker works best on dark-colored carpet backing. | |
| Application | Trowel with 1/8" V-notch | The V-notch ensures you apply the perfect, even amount of adhesive. |
| Marine-grade carpet adhesive | Check the cure time and temperature requirements on the label. | |
| Carpet roller or J-roller | A heavy roller is crucial for pressing the carpet firmly into the glue. | |
| Safety | Safety glasses | Protect your eyes from flying debris and chemical splashes. |
| Respirator/Mask | An organic vapor respirator is a must when working with strong adhesives. | |
| Nitrile gloves | Keep the nasty, sticky glue off your hands. |
Having these items ready will make the entire process flow smoothly. A little organization upfront saves a lot of headaches later.
Getting Your Boat Deck Ready for New Carpet
The final look of your new carpet depends entirely on the prep work. If you cut corners here, you will have problems later. The first job is removing the old carpet and glue.
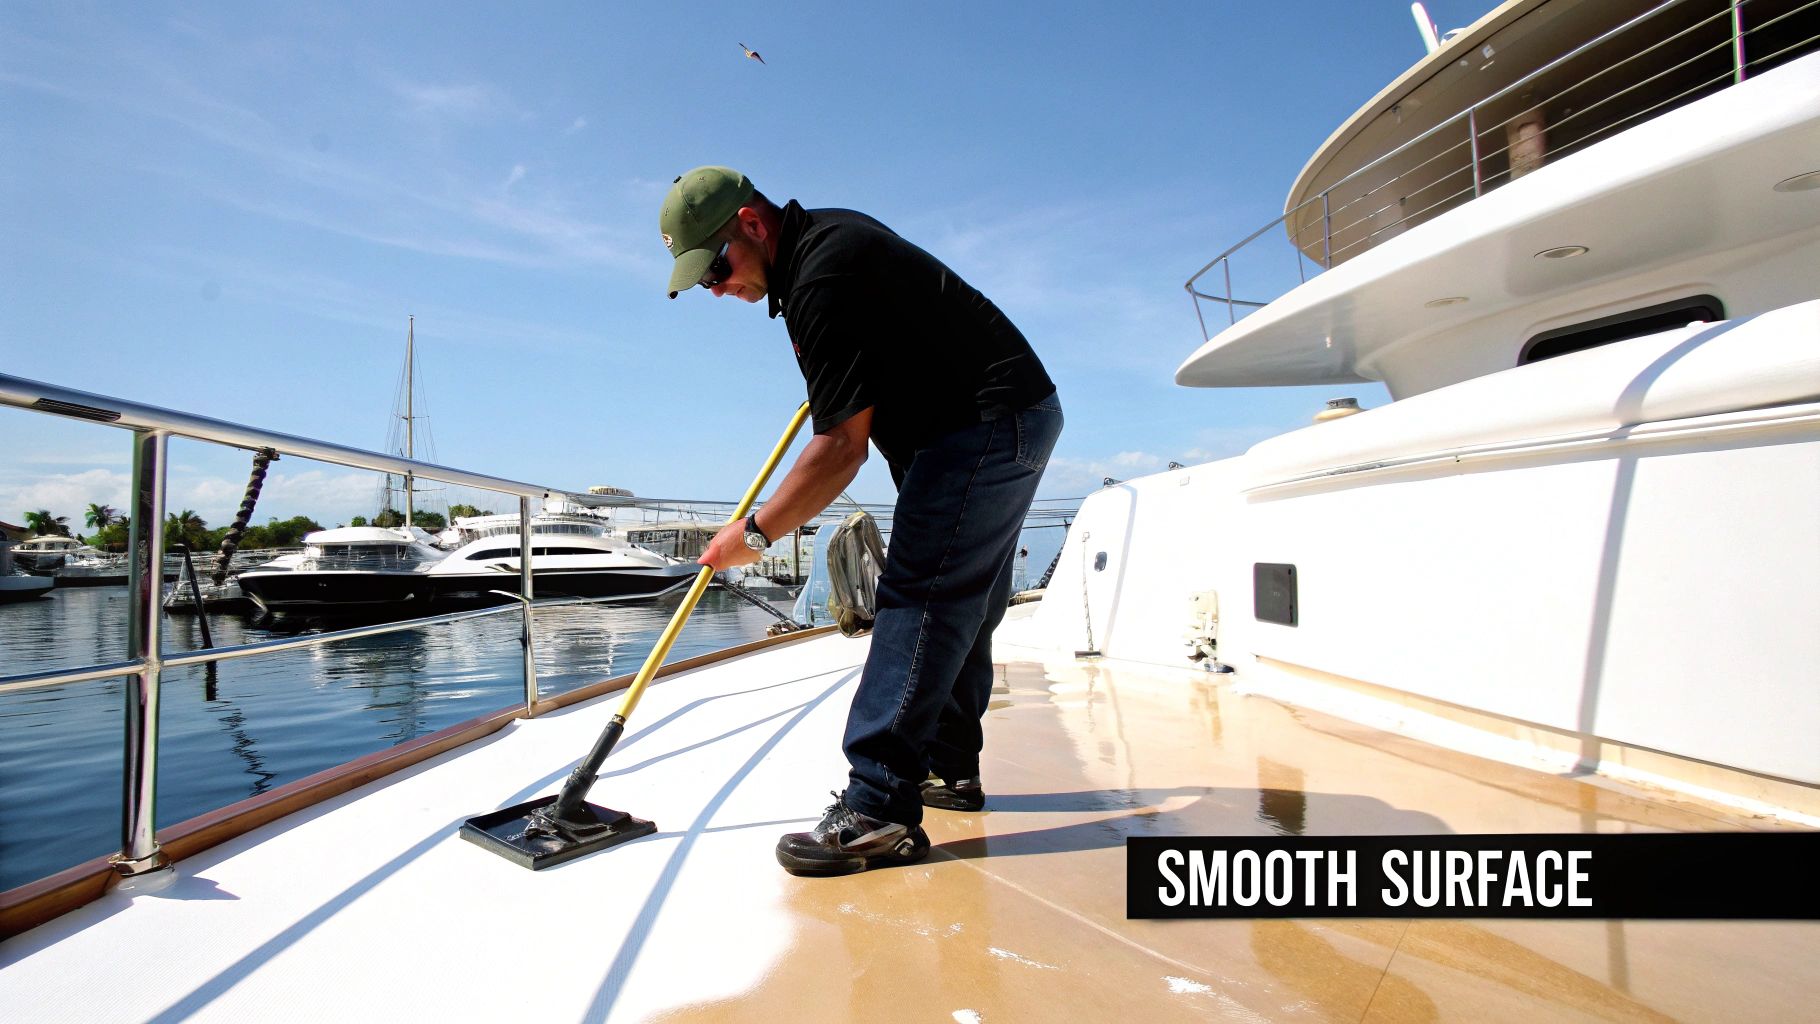
Rushing this part can lead to your new carpet peeling up prematurely. You are aiming for a deck that is perfectly clean, dry, and smooth. Start by clearing everything off the deck that isn't bolted down.
For a professional job, remove hardware like seat posts and through-deck fittings. This lets you lay the carpet flat without cutting around obstacles. This gives you a clean canvas to work with.
Tearing Out the Old and Scraping Off the Gunk
First, start ripping up the old carpet. If it's a large piece, use a utility knife to slice it into smaller strips. This makes the job less overwhelming.
Once the carpet is gone, you'll face the real challenge: the old, dried adhesive. This is where patience and a good scraper become essential.
Pro Tip: For stubborn glue, try gently warming it with a heat gun. This can soften it enough to make scraping easier. Work in a well-ventilated area and wear a respirator.
After scraping away most of the old glue, deal with the residue. An adhesive remover or acetone works well, but test it on a small spot first. This ensures it doesn't damage your fiberglass.
Give the deck a final pass with a sander to smooth any rough spots. This creates a perfect texture for the new adhesive. This careful prep is what makes a job last. Solid preparation can extend your carpet's life by 20% to 30%, a key factor in the marine carpets market.
Getting Your Measurements and Cuts Just Right
Here is where craftsmanship comes in. The difference between a professional and an amateur job is precision. If your old carpet pieces are intact, you can use them as a template.
But what if the old carpet is a mess? It's time to create fresh patterns from scratch. Use a big roll of butcher paper or builder's paper for this.
Lay the paper over each section of your deck and trace the exact footprint. Meticulously mark cutouts for hatches, seat pedestals, and any other hardware.
Pro Tip: Pay close attention to the carpet’s pile direction, or grain. The grain must run the same way across all pieces. If not, the light will hit it differently, and the color will look off.
From Pattern to Carpet: Making the Cut
With paper templates ready, lay them on the back of the new carpet. Use painter's tape to hold them firmly in place. A silver or white marker is perfect for tracing outlines on the dark backing.
Before you cut, double-check every line. Now for the cut itself. Use a heavy-duty utility knife with a new, sharp blade.
A dull blade will snag and fray the carpet, leaving a ragged edge. Swap blades frequently. Always cut from the backside of the carpet, following your lines with slow, steady pressure.
This level of care is also seen in other flooring jobs, like in guides on how to install artificial turf. Rushing this stage is a recipe for disaster. A perfect fit is your reward.
Applying Adhesive For A Long-Lasting Bond
Now it's time for gluing everything down. Your project's success hinges on a strong, permanent bond. This starts with using the right marine adhesive and applying it correctly.
Pour some glue onto the deck section you are working on. Grab a 1/8” V-notched trowel and spread the adhesive evenly. The V-notches leave just the right amount of glue for a solid grip.
After spreading the glue, you must wait. This is a critical step called "flash time." The solvents evaporate, making the glue tacky enough to grab the carpet. Check the manufacturer's instructions, but you're typically looking at a 15-20 minute wait.
This visual shows the importance of prep work before you even open the glue.
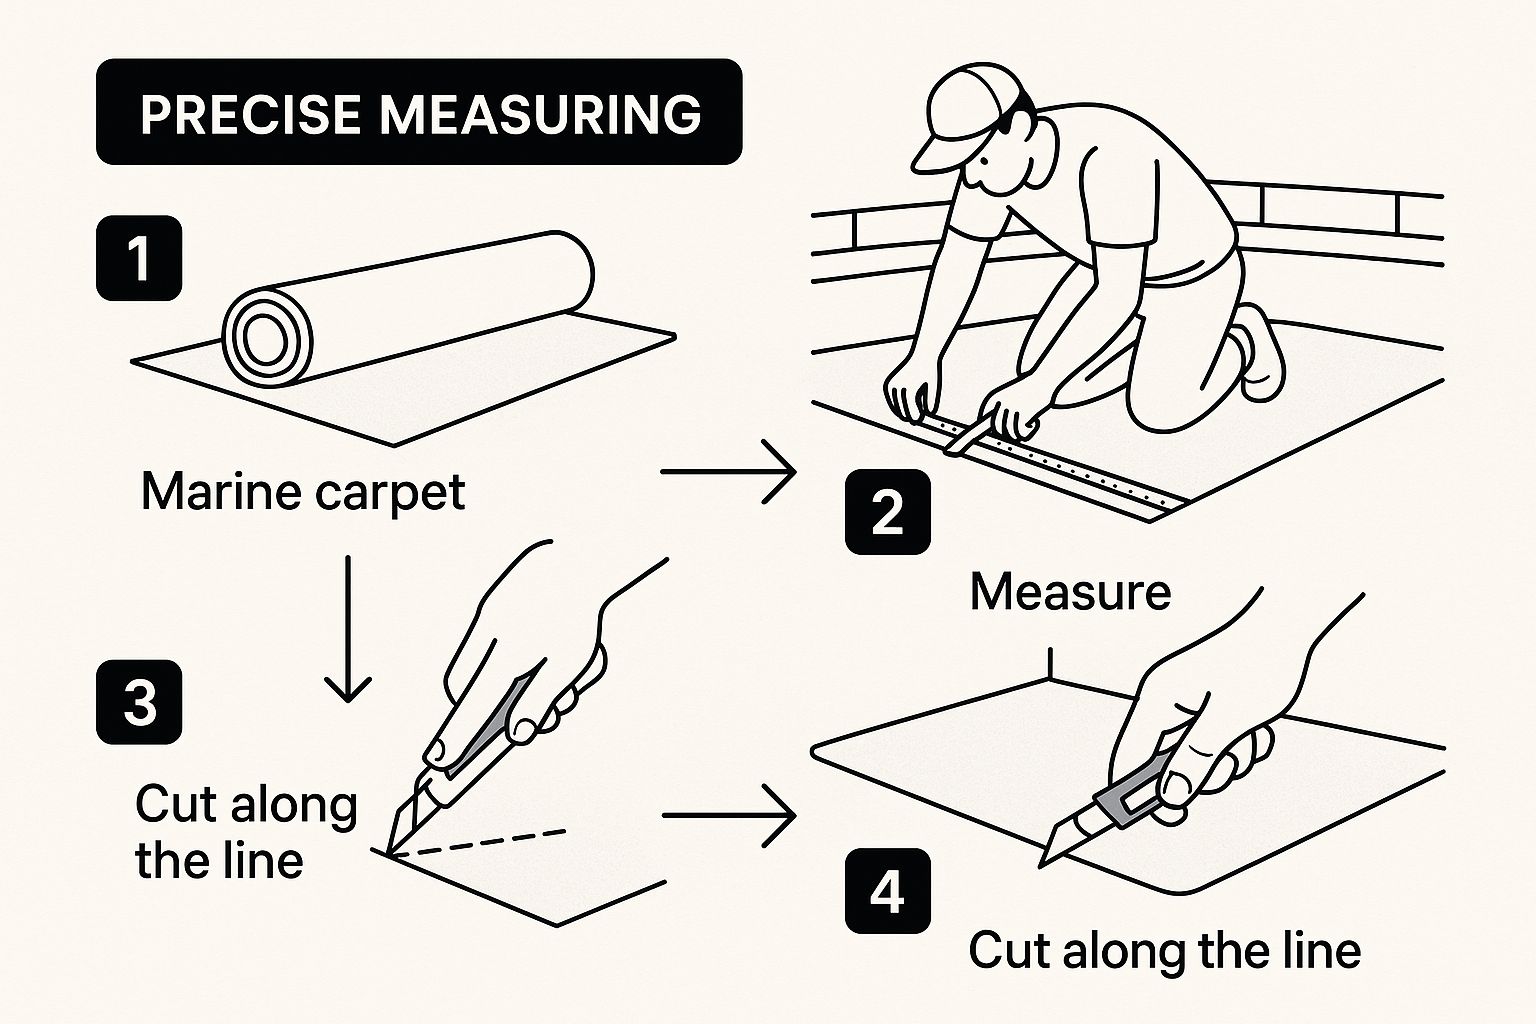
As you can see, precise measurements are the foundation. Getting that right makes the gluing and fitting process much smoother.
Laying and Rolling the Carpet
Once the adhesive feels tacky to the touch, it's time to lay the carpet. Carefully place your pre-cut piece onto the glued surface. I recommend starting from the center and smoothing outward to the edges.
This trick helps push out trapped air and prevents bubbles. With the carpet laid down, it's time to make the bond permanent. For this, you’ll need a heavy carpet roller or a J-roller.
Apply firm, even pressure as you roll over every square inch. This final step locks it all in. It ensures full contact between the carpet and glue for a waterproof hold.
If you're thinking about other upgrades, check out our guide on livewell tanks for boats.
Finishing Touches and Long-Term Carpet Care

The carpet is down, and the glue is setting. Now it's time for the detail work that makes a job look professional. This is all about clean edges and smart protection.
Grab your utility knife with a fresh blade. Carefully trim any overhanging carpet along the gunwales and around hatches. Slow and steady wins the race here.
For exposed edges in high-traffic spots, it's a great idea to seal them. I run a thin bead of clear, marine-grade sealant along the cut edge. This prevents fraying and adds a layer of water defense.
Don't get impatient now. The adhesive needs a full 24 to 48 hours to cure completely. Fight the urge to walk on it, get it wet, or load gear back in.
Keeping Your New Carpet Looking Great
Once everything is cured, a little routine maintenance goes a long way. Think of it like any other part of your boat. It needs care to perform its best.
Regularly vacuuming up sand, dirt, and fish scales is your first line of defense. This prevents grime from getting ground deep into the fibers. If a spill happens, tackle it immediately before it sets.
To get the most out of your investment, check out these top carpet cleaning tips for in-depth advice. Of course, keeping the whole boat in shape includes knowing water rules, which you can find in the ultimate guide to buoys and flags.
Let's get into some common questions that pop up during this project. Getting these sorted out can save you headaches. It ensures the job turns out sharp and professional.
One of the biggest questions is about timing the project with the weather. Your adhesive's performance is tied to temperature and humidity. Try to work on a dry day with temperatures between 65°F and 85°F.
Dealing with On-the-Fly Problems
What if you find soft spots or rot in the deck? The answer is simple: stop everything. You must fix the deck before laying new carpet.
Covering structural damage is asking for bigger, more expensive repairs later. Moisture will get trapped, and the rot will worsen.
Another common issue is choosing the right glue. Most hardware store options won't survive on the water.
You need an adhesive that can handle the marine environment. I stick to a non-acrylic, two-part epoxy or a top-shelf contact adhesive made for boats. These handle temperature swings and moisture without failing.
Is it necessary to remove all hardware? Yes. I know it's extra work, but it's the only way to get a seamless, factory-finished look. Trying to cut around every obstacle is a nightmare and never looks as good.
After the Glue Sets: Care and Timing
How long before you can get back on the water? Most marine adhesives need 24 to 48 hours to cure completely. Keep the carpet dry and stay off of it during this time.
Finally, how do you keep the new carpet looking good? Vacuum it regularly. If a spill happens, use a simple solution of mild soap and water. Always check the cleaning instructions from your carpet's manufacturer first.
For more expert guides and tips on everything from maintenance to navigation, visit us at Boating Articles. Explore our extensive library of resources at https://boating-articles.com to make every moment on the water safe and enjoyable.